This assignment is super easy and super short. Please complete Activity 0 and Activity 1 on Wednesday or Thursday. I will complete Activities 2-4 in class on Friday as a demo but you will still need to submit those activities to Canvas!
Activity 0. Downloading and installing Python
Our first and most important task is to get Python and our first “Integrated Development Environment” (like a Microsoft Word for programs) called IDLE installed on your computer. We will use the Python 3 programming language and IDLE, which is Python’s Integrated Development and Learning Environment which we need to install.
What if I've already installed Python on my laptop?
Many people who have programmed with Python before already have Python 3.x installed. To check, search for an existing Python installation. If you already have a version of Python3 installed, move on to Part 2. It doesn't hurt to install another version of Python, but it's not necessary. If you have any questions, feel free to ask Prof. Bain or one of the peer mentors / TAs.Important Note for Windows Users
Make sure that the checkbox at the very bottom that says Add Python 3.x (the screenshots show Python 3.7 but this applies to all Python installations) to PATH is checked: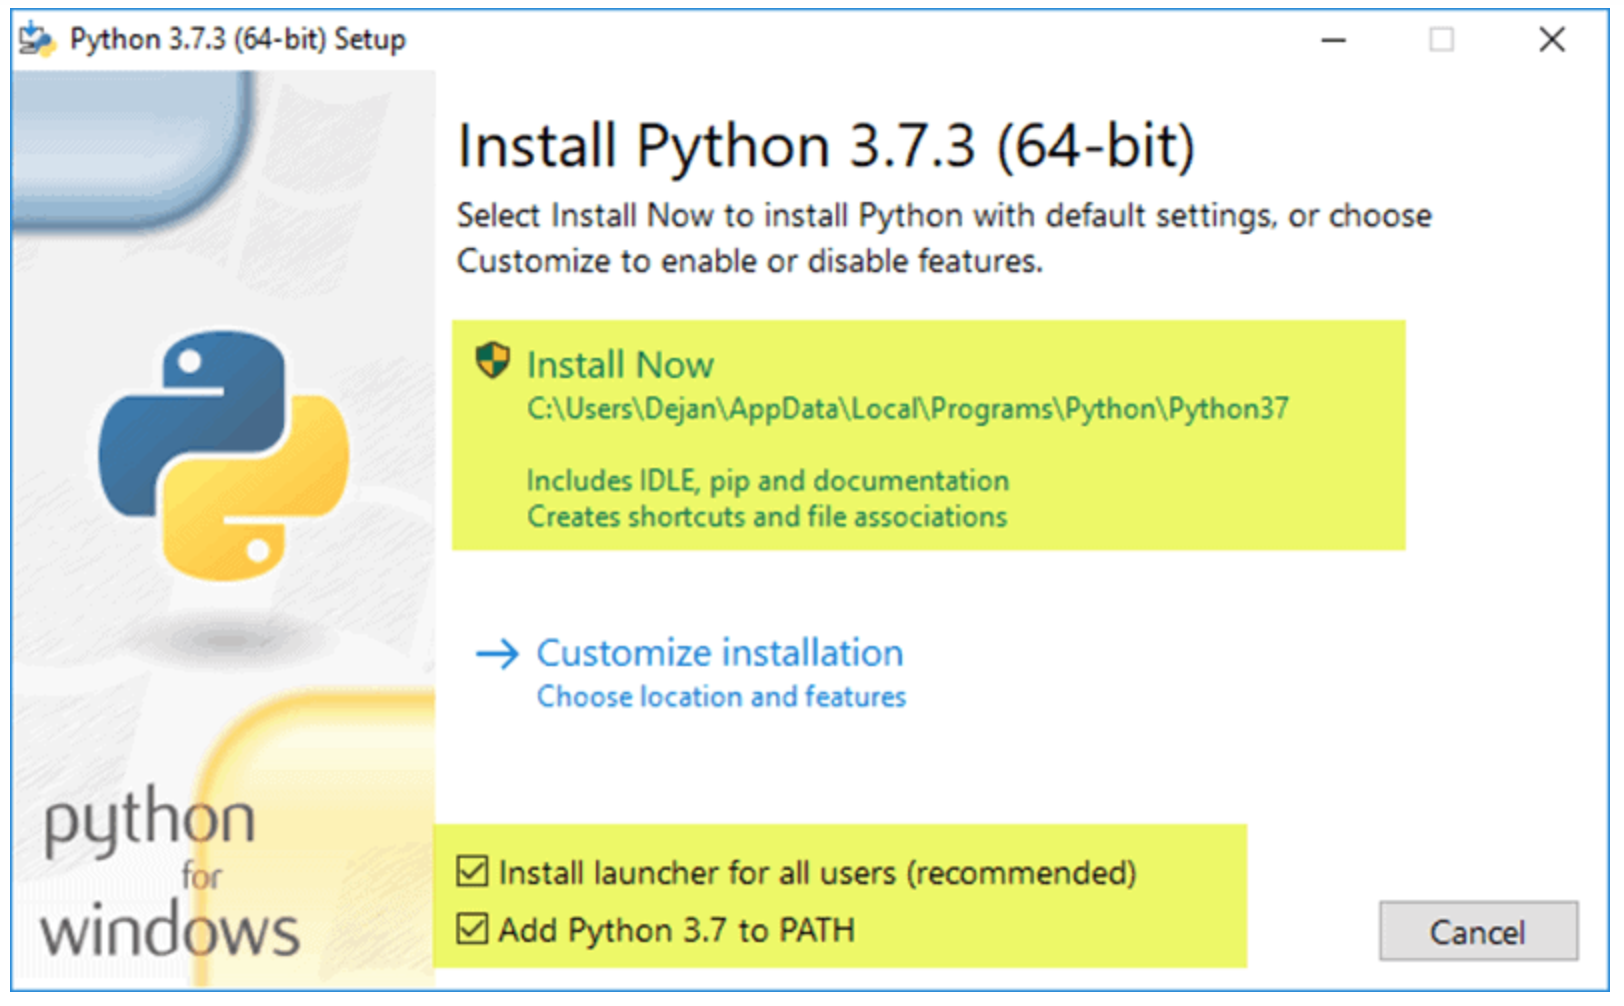
Windows users should also follow the instructions here to make it so you can double click on a
.py file and have it open in IDLE automatically. Download the latest version (3.14.x) of python here: https://www.python.org/downloads/. You should be able to just click the big yellow “Download” button, but if it asks you which version you’d like to download: if you’re on a Mac, use the “Universal2” installer; if you’re on a Windows machine, pick the “Windows installer (64 bit)” version. Once it downloads, you’ll need to launch the file you downloaded.
Once the installer is finished, you’re done with Activity 0! If you have an issue, feel free to post a question on edSTEM or come to class on Friday with your question (I can help diagnose issues before/after class).
Activity 1. Signing Up for a Tutorial Team
A key part of this class is your Tutorial Team (up to 8 people; no exceptions) with whom you’ll work each week to complete in-class exercises. Think of it as a smaller community within the larger course community.
There are several ways of finding a Tutorial Team in our class:
- EVERYONE is expected to fill out our Tutorial Team survey (linked below) regardless of whether or not you have Teammates in mind already.
- If you already have teammates in mind, go ahead and sign up for your group in Canvas. Instructions are located here. Just pick a group and have each person interested sign-up for that group. We may add students to your pre-formed team depending on the survey results.
- If you'd like to be assigned to a Team, just fill out the Team Survey and we'll assign you a Team before the second Wednesday of class.
Note: If you have not signed up for a Team on Canvas by Friday evening at 11:59pm, we will use your Survey results to assign you to a team. You will not be able to self-register for teams after Friday.
TEAMS SURVEY (note, you must be logged into your NU Gmail account in order to access; this is a clickable button). This is REQUIRED. If you don’t fill it out, you'll get a 0 on Exercise 0.
While we’d like for the Teams to be as stable as possible throughout the quarter, stuff does happen so switching will be allowed after Week 2.
Activity 2. Our First Program
Note: We will complete this and the following two activities during class on Friday but you are free to complete them yourself if you’d like.
Navigate to the folder on your machine where Python was installed. For me, on a Mac, my IDLE was saved to Applications > Python 3.14 (or you can also search for it). For Windows users, it will likely be in a folder inside of Program Files (which you can also search for). It should also create a shortcut on your Desktop.
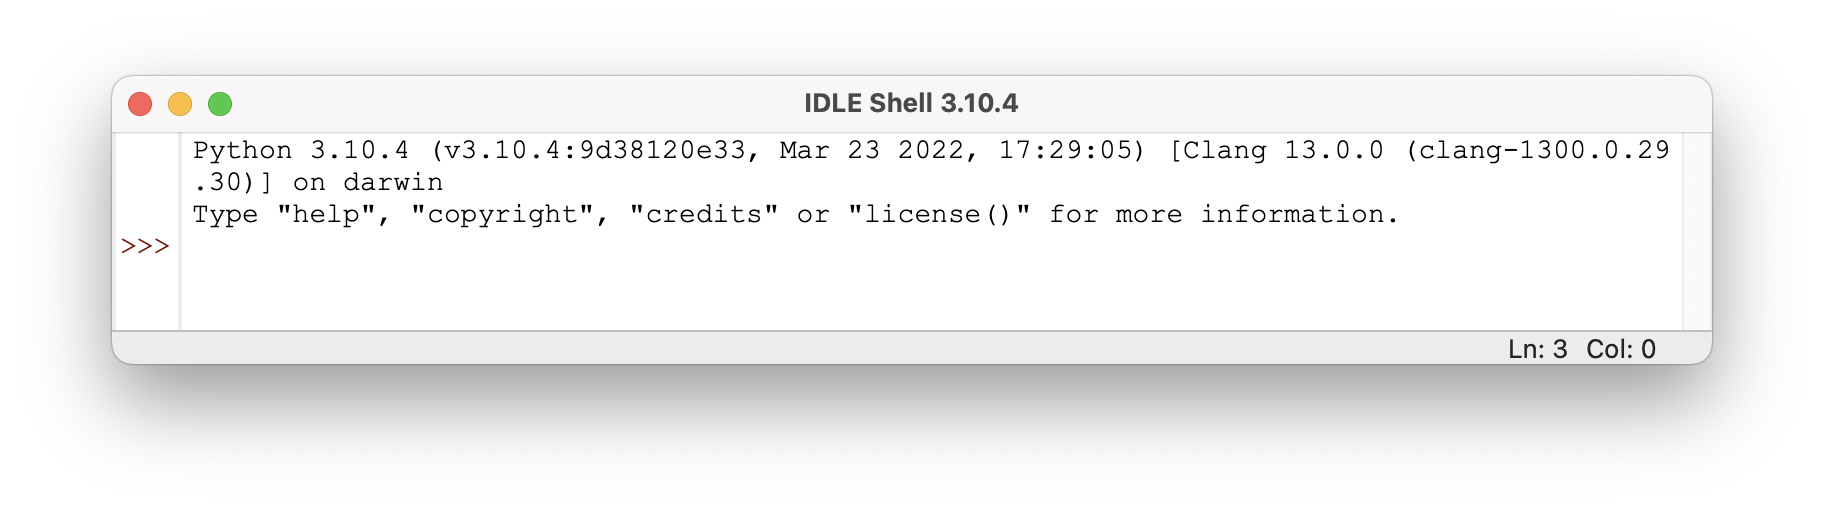
Inside, the Python 3.14 folder, you’ll find a program called IDLE - this is the IDLE application. Double click on that file to run it. You should then see something like this (disregard the version numbers in the screenshots):
I recommend keeping IDLE in your dock (on a Mac) or making a Desktop Shortcut to IDLE (on Windows).
At the >>> prompt, you can type any valid python command. For example, type print("hello world!") and hit enter (Note: those quotation marks are important!). You should see something like this:
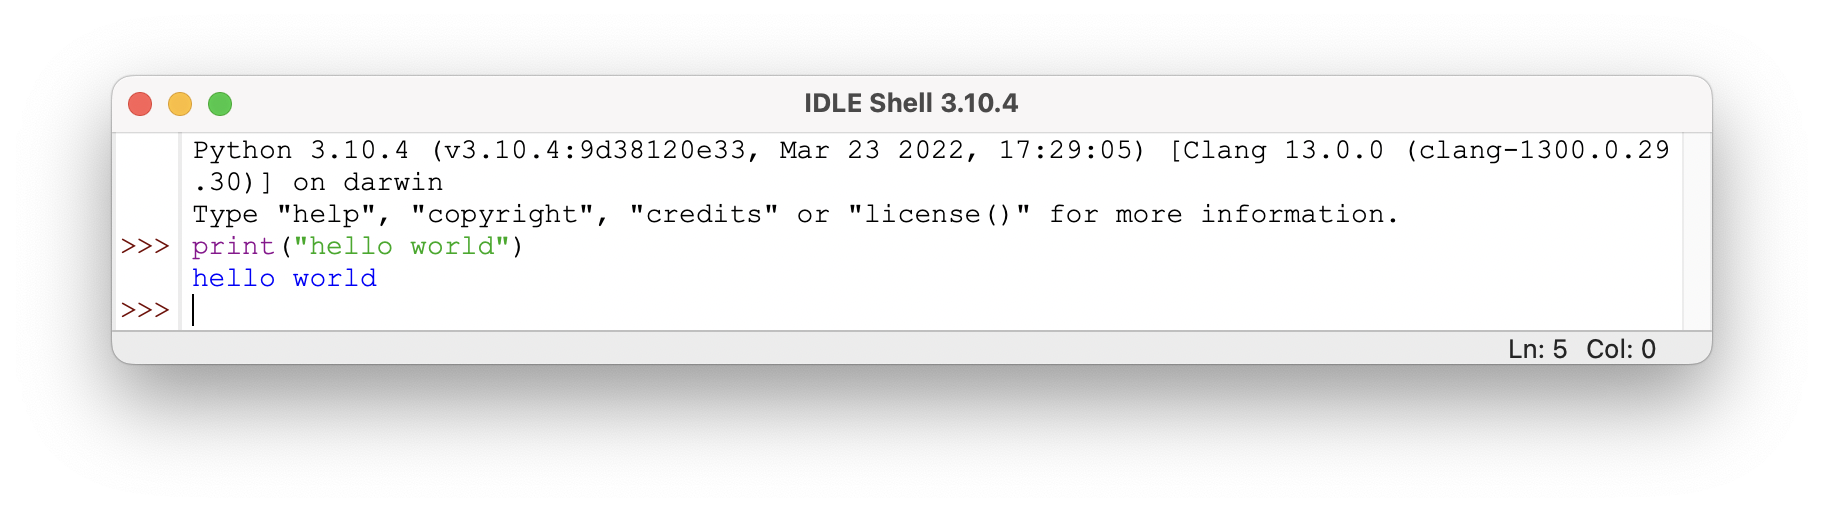
This is called the Interpreter Window. It allows you to run lines of Python code one at a time. The above example asks Python to run the print function with an input of "hello world!" (which is a type of data we call a string).
Activity 3. Running a Program in the Editor Window
One of the core tenets of this class is that there is no such thing as a little program. All programs, regardless of their size/length, are powerful in that you have successfully translated an idea from your head to a form that the computer understands.
So let’s write a powerful program! To do that, we need to first open a new .py file just like we might create a new Microsoft Word or Google Doc. To do that, go to the File menu (at the top of the screen on a Mac; at the top of the IDLE window on Windows) and select “New File”. You should now see a new window that we will call an Editor Window with the title untitled. Now, let’s write a program in this new window.
2 + 3
To run this program, go to the “Run” menu (again, at the top of the screen on a Mac; at the top of the window on Windows) and click “Run Module.” IDLE will then prompt you to save your file. For now, name the file exercise_0.py and save it to your Desktop so it’s easy to find later.
After your file is saved, Python should then execute or run your program and show the results in the Interpreter Window. Unfortunately, we won’t see the outcome of our program because Python is dumb. **It won’t do anything you don’t ask it to. So we need to specifically as it to show us the result of this calculation.
print(2 + 3)
Update your program and then Run it again.
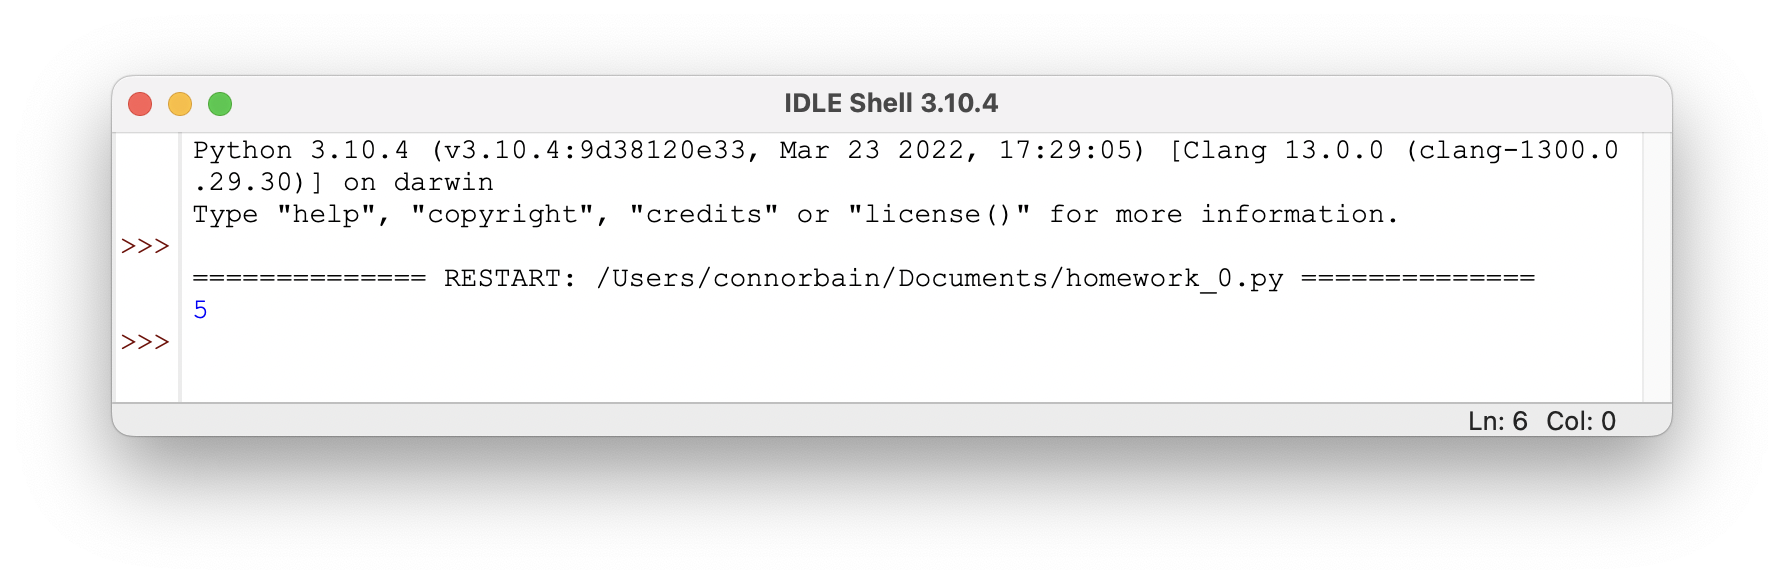
If you see a result of 5, congratulations! You’ve officially saved and run your first program.
Note: Never turn in code that you have not tried to
Run! Anytime you add something to your program, you should try running it. Programming is a process of translating what you have in your brain into a form the computer understands. You should be constantly checking to see if that translation process is proceeding as you think it is.
Activity 4. Writing a Definition
While print(2 + 3) is a pretty dope program, sometimes we need to teach the computer to remember a particular piece of data to be used later in our programs. We can teach the computer to remember pieces of data using a variable assignment. Edit your program in the Editor Window (the one that DOES NOT have >>>) so that it looks like the following:
math = 2 + 3
print(math)
netid = "abc1234"
print(netid)
Make sure to replace the thing in quotation marks with your actual NetID. This tells Python that from now on, when you give it the symbol netid it will use the value "abc1234".
Note: Those quotation marks
"are important! They tell Python that this thing inside the quotation marks isn’t just a symbol, it’s a piece of data called a string (that’s why Python makes it green).
Make sure to run your program which should look like the below:
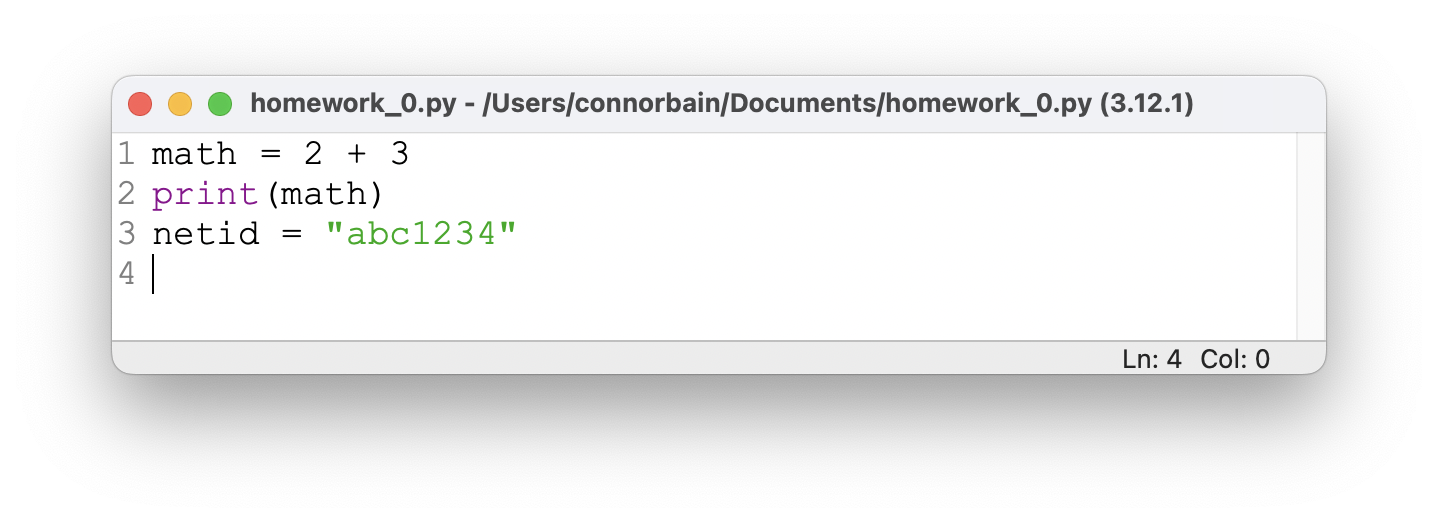
What are those numbers on the left?
Those are called line numbers and allow us to easily call out "locations" in our program. Depending on what computer you're working on, they might not show by default. You can enable them by going to the OPTIONS menu in IDLE and selecting "Show Line Numbers".Does the file name matter?
You'll notice in the screenshot I've named the file "homework_0.py" instead of "exercise_0.py". Unless we specifically tell you what to name the file, it's not actually important since Canvas will rename your file when you upload anyway. What is important is that you name it something and place it somewhere where you can remember.Notice that you won’t see your NetID outputted in the Interpreter Window. That’s because you didn’t actually ask Python to do anything with your NetID–you just asked it to remember it. That’s okay for now. We just want to have it store the NetID so that when we run your program, we can tell your program apart from your classmate’s.
Make sure to save your modified program using the File menu and selecting Save on the Editor Window.
Note: Please be sure to save the Editor Window and NOT the Interpreter Window (the one with the >>>).
Congratulations, you’re officially a programmer!
Turning it in
Most of the homework exercises in this class will be graded via an autograder – a program, written in Python, that will run your program and test it to see if it meets all the expectations of the assignment.
This means that you must carefully read each assignment description and follow it exactly. If your assignment does not satisfy the requirements in any way (even if you think it’s small and inconsequential) you will receive points off (or in the worst case, not receive any points at all).
What should I double check?
For this assignment, because the program is so short, there's only a few things you should check:
- Does your program run without any errors?
- Are you outputting the result of some math calculation?
- Are you storing the result of a math equation in the
math variable? - Are you storing your actual netid inside the
netid variable? - Important: Python is case-sensitive (i.e. capitals matter) so make sure that your second line actually says
netid = ... wherenetid has no spaces and no capitals. - Make sure your netid you enter is actually your netid. The autograder will compare the submitter's netid to the one in your program.
For this assignment, you will upload your exercise_0.py file to the assignment on Canvas. DO NOT UPLOAD ANY OTHER FILES. Once you’ve submitted your file to Canvas, you’re done!
Note: You won’t receive feedback from the autograder for about 15 minutes after you submit (note: the autograder won’t be turned on until during class on Friday). Once it runs your submission, you’ll see a comment with an “HTML” file attached on your submission. These files are openable in a web browser (e.g. Safari, Chrome, etc.) and show the results of the tests on your program. If you fail or receive an error on a test, you can use the report to diagnose the problem and resubmit. In future homework exercises, there will be a limit to the number of submissions you can submit to Canvas. We will always use the most recent submission for your grade (that means its grade and its submission timestamp).
Submission Details
Remember, close IDLE before you submit to ensure that you’ve saved your latest work. Once you’ve successfully submitted you should receive feedback from the autograder in 30 or so minutes. If you fail one of the checks, you’re welcome to resubmit (up to the Canvas resubmit limit for that assignment). If you’re confused on how to fix one of the checks, then bring your submission and the test results to office hours!