LEARNING OBJECTIVES:
- Practice working with pre-built functions, including reading documentation
- Practice writing your own functions
Note on using Other Functions
Note, you are NOT allowed to use any other functions or methods that are not specifically mentioned below. This is one of the learning objectives of the assignment.In this assignment, you are going to get some practice writing functions using a graphics library that will ultimately enable you to create more complex shapes (like animals, trees, plants, etc.).
Getting Started
First, download the two exercise files below and, like the tutorial, make sure they're in the same folder:
| Exercise Starter File | Helper File |
|---|
Note on Reading Documentation
Learning to read technical documentation is one of the most important skills we need to practice in order to become a programmer. You are essentially learning to read in a new genre, so interpreting the documentation takes practice (and patience). Ultimately, learning the exact details of these libraries isn't crucial. However, learning how to work with modules (which all have structures similar to the ones we'll use) is one of the most important things you will learn in the class. In this assignment, we're going to give you "digests" of technical documentation. In future weeks, it'll be up to you to read the real deal.Your Tasks
Open up ex2.py (hopefully you’ve renamed it from ex2_template.py) and take a look at what’s already existing in the file. Make sure to run it to see its output as it stands now. Your task for this homework is split up into 4 parts.
Note: Just like in the tutorial and lecture, do not edit (or even bother opening)
cs110_ex2.py– the helper file.
Task 1. Practice
Right now if you run ex2.py you’ll see a coordinate grid. Notice that there’s one strange thing about it – the y-axis is flipped! As we go DOWN on the y-axis, the y-values INCREASE. As we go UP the y-axis, the y-value DECREASES. Keep this in mind as you’re working.
This first task DOES NOT ask you to write any function definition's (i.e. nothing with the
On a Mac in Dark Mode - you might not see the grid!
If you're on a Mac and are currently in Dark mode, you might get white grid lines with greyish dots. You can fix this by either:- Use these instructions from Apple to switch to Light mode.
- On line 2, change the value of the background argument to "black" rather than
"white".
While our turtles are great at drawing shapes, it’s time to graduate to more abstract thinking. We don’t want to be stuck having to think about designing individual shapes. Instead, we just want to be able to use functions that make those shapes directly!
You’ve been given a function called oval. It takes the following parameters:
-
x(int) - the x-coordinate of the center of the oval -
y(int) - the y-coordinate of the center of the oval -
radius_x(int) - the radius on the x-axis of the oval -
radius_y(int) - the radius on the y-axis of the oval -
color(string, optional) - the color to draw the oval (defaults to"olive drab") This is different than in the pre-recorded lecture.
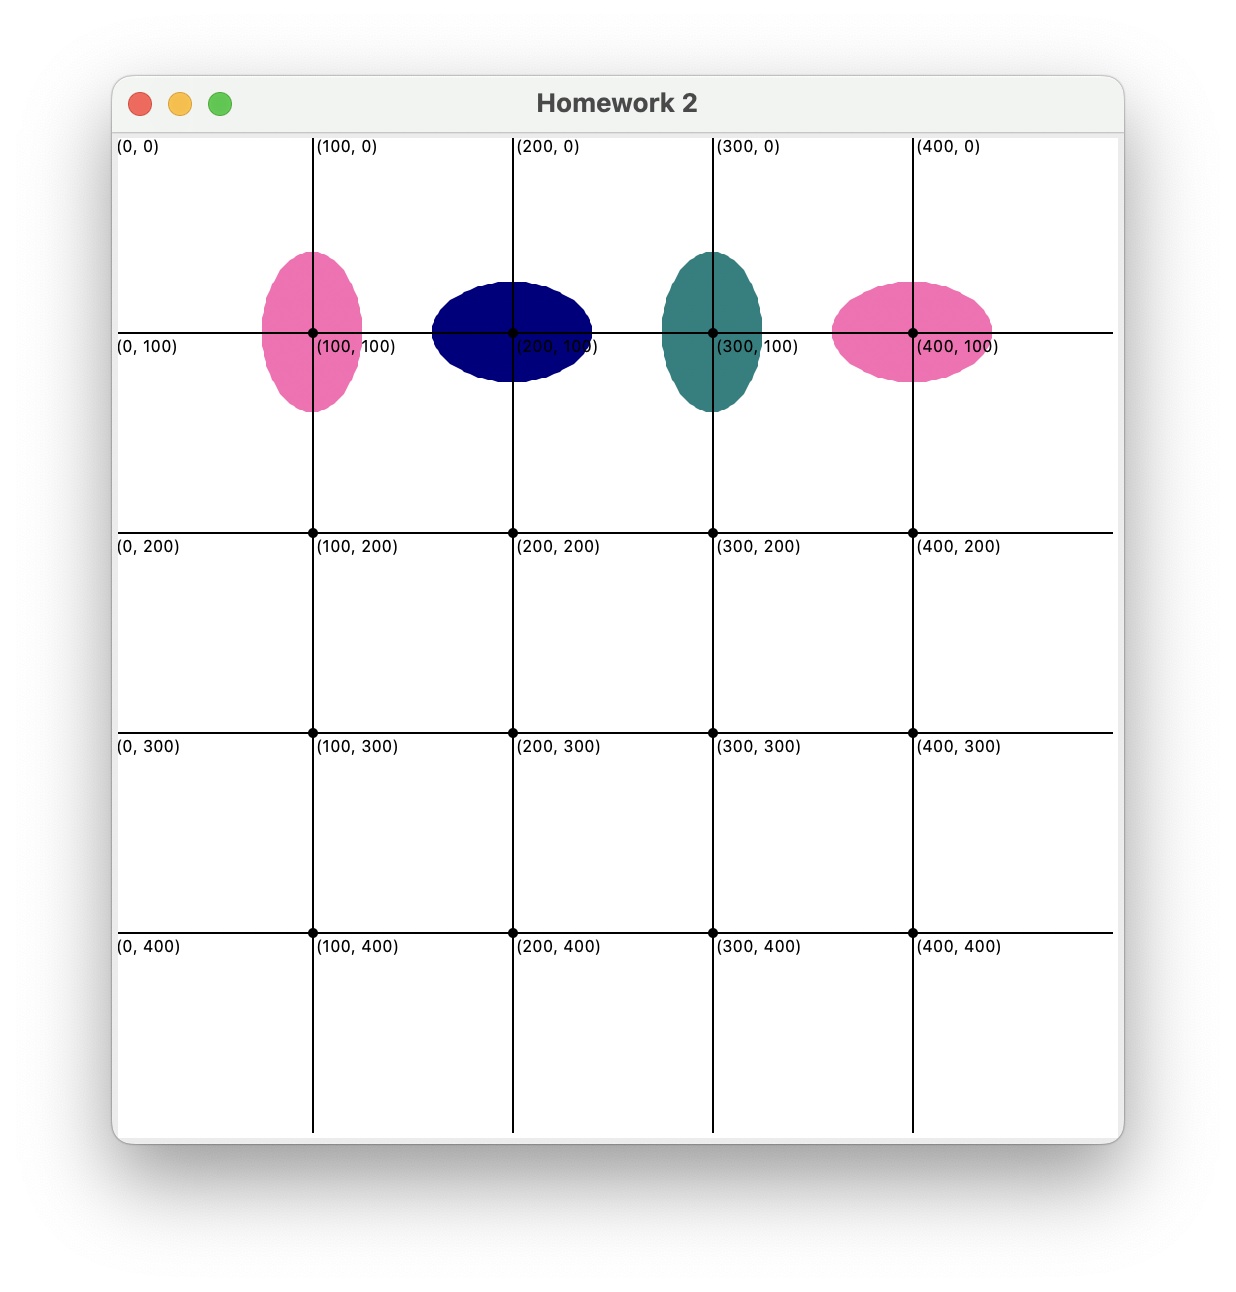
In the section of the file marked ## TASK 1 write 4 function calls to oval that…
- draw an oval with a center of
(100, 100), a total width of 50 and a total height of 100 (use the default color). - draw an oval with a center of
(200, 100), a total width of 100 and a total height of 50 that is red. - draw an oval with a center of
(300, 100), a total width of 50 and a total height of 100 that is yellow. - draw an oval with a center of
(400, 100), a total width of 100 and a total height of 50 (use the default color).
Finished Product Screenshot
Task 2. Create a circle function
The job of the circle function is to draw a circle to the canvas with a given radius and centered at a given center point (x and y). It will have the following parameters:
-
x(int) - the x-coordinate of the center of the circle. -
y(int) - the y-coordinate of the center of the circle. -
radius(int) - specifies the radius of the circle. -
color(str, optional) - represents the color of the oval, defaults to"olive drab".
Your job: Write the appropriate function header and body for the circle function. Just like the square function in Tutorial 2, the function’s body will only be one line: a call to the oval function!
Hint 1
When calling the oval function, you're going to have set the parameter color to the value of whatever color your circle function is called with. Because they both have the same parameter name, you'll see something weird at the end of your call to oval: color=color.Hint 2
Your circle function will end up looking something like this:
def circle(x, y, radius, color):
  oval(the name of the argument that represents the x-coordinate, # this will be seemingly obvious
       the name of the argument that represents the y-coordinate, # this will be seemingly obvious
       the name of the argument to use as the radius on the x-axis, # hint, a circle has identical
       the name of the argument to use as the radius on the y-axis, # radii on x / y axes,
       color=the name of the argument to use as the color # also, seemingly obvious
      )
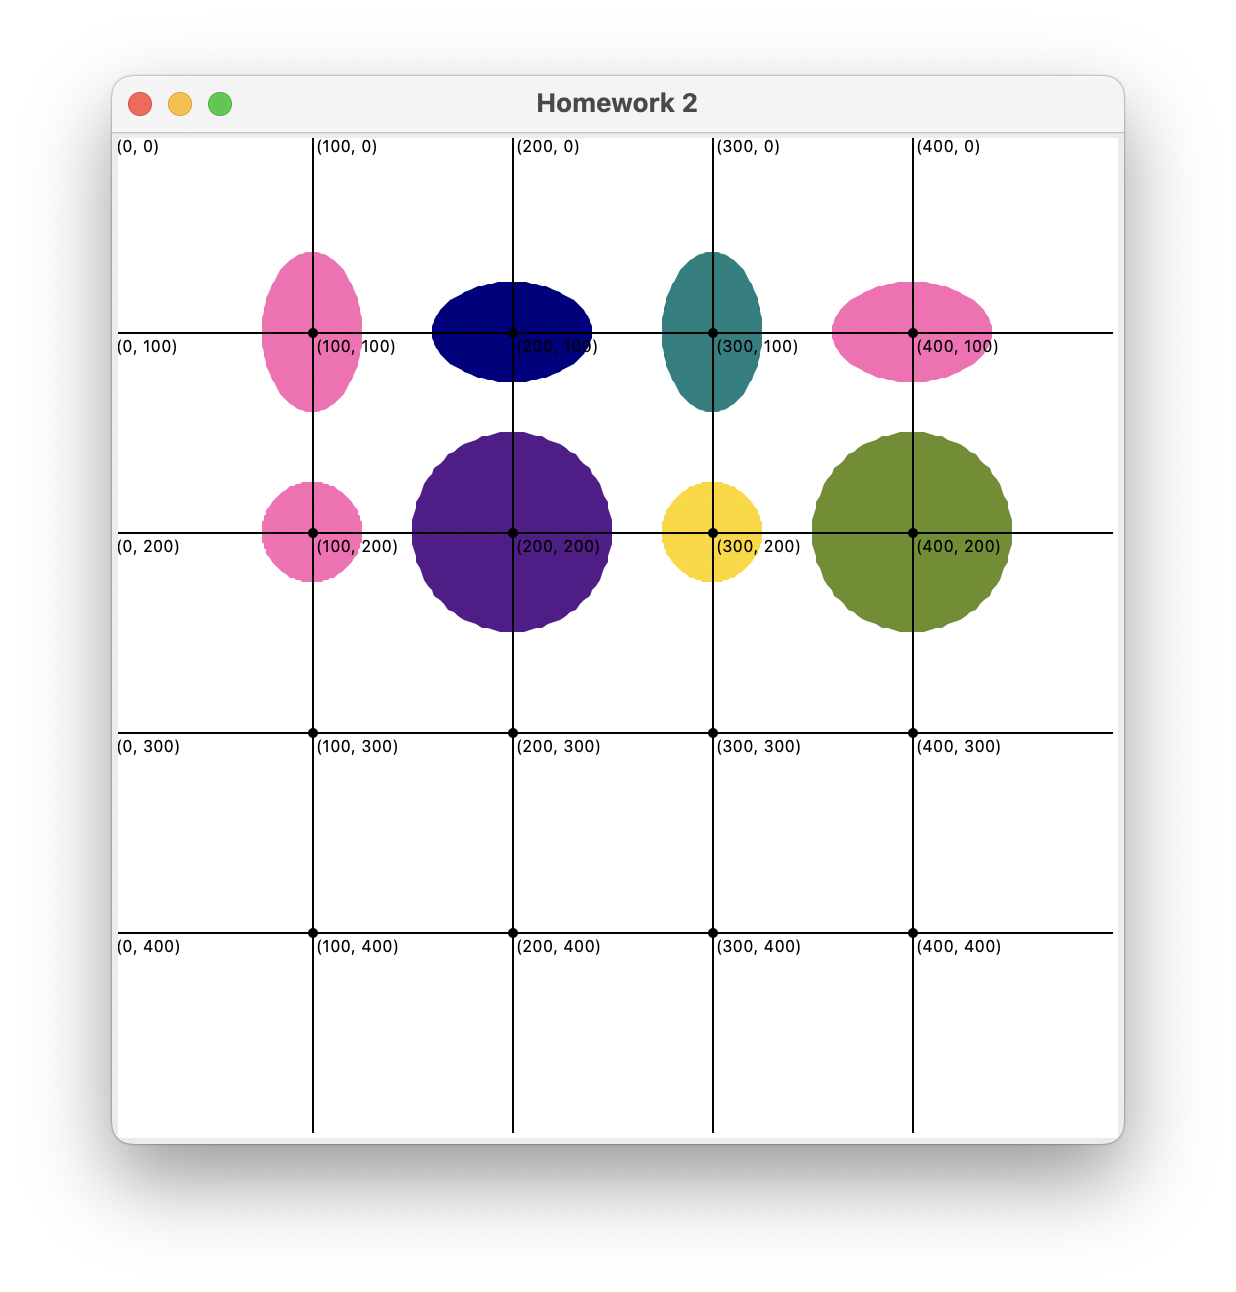
Here’s some tests for your oval function (the image you should see can be seen below). You can copy and paste them into your program but make sure they are not part of your function's body as otherwise they won't run!
# Testing circle!
circle(100, 200, 30)
circle(200, 200, 60, color="tomato")
circle(300, 200, 30, color='cyan')
circle(400, 200, 60, color="gold")
Finished Product Screenshot
Task 3. Create a bullseye function
The job of the bullseye function is to draw a bullseye of 4 concentric circles to the canvas, centered at center and alternating colors. The smallest concentric circle will have a radius of radius (value of the argument), and each additional concentric circle will be 50% bigger (i.e. radius, radius * 1.5, radius * 2.0, radius * 2.5). Your bullseye function needs to have five parameters:
-
x(int) - the x-coordinate of the center of the bullseye -
y(int) - the y-coordinate of the center of the bullseye -
start_radius(int) - the radius of the innermost circle -
color_a(string, optional) - the first color to alternate with (defaults to"blue") -
color_b(string, optional) - the other color to alternate with (defaults to"red")
Your job: Your job is to use the circle function that you just created to draw a bullseye (with 4 concentric circles of alternating colors). YOU MAY NOT USE oval in this function. You'll receive 0 credit for this function if you use oval instead of circle.
HINT: you’ll have to draw the biggest circle first, or else your big circle will overwrite (occlude) the smaller circles.
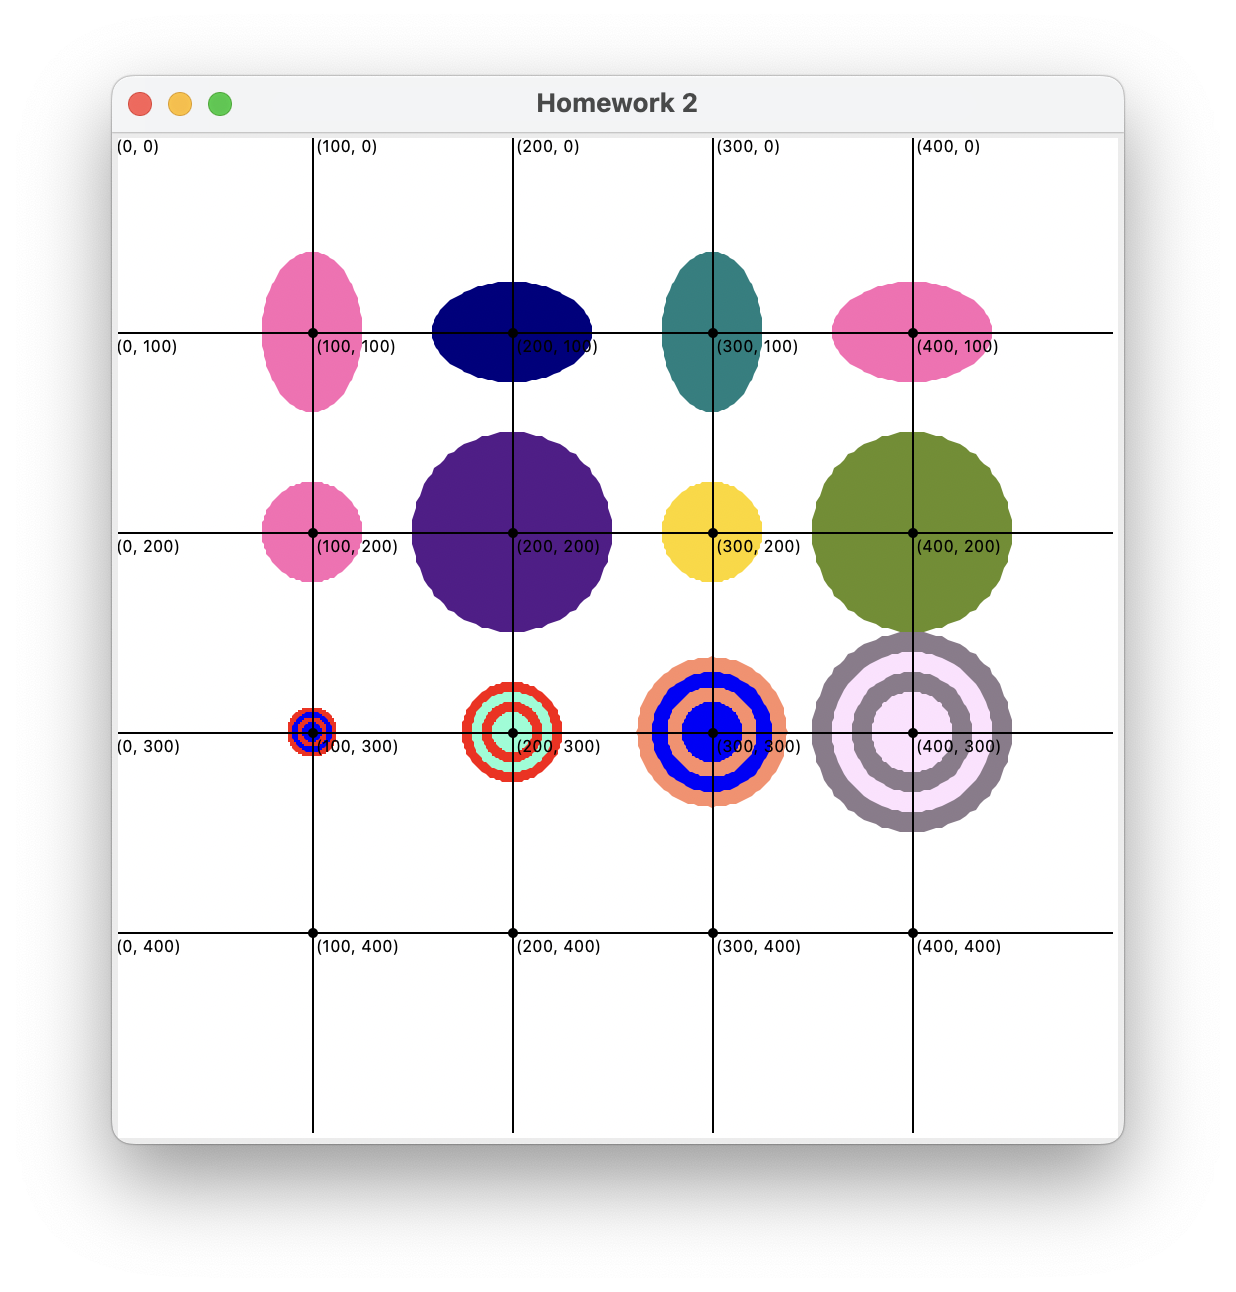
Here’s some tests for your bullseye function:
# Testing bullseye!
bullseye(100, 300, 6)
bullseye(200, 300, 12, color_a="orange")
bullseye(300, 300, 18, color_b="thistle")
bullseye(400, 300, 24, color_a="khaki", color_b="sea green")
Finished Product Screenshot
Task 4. Create the face function
The job of the face function is to draw a face (i.e. a circle) with two eyes (i.e. ovals) to the canvas, according to the center point and width specified by the arguments. The function accepts the following arguments:
-
x(int) - the x-coordinate of the center of the face. -
y(int) - the y-coordinate of the center of the face. -
width(int) - the width of the face. (Remember, yourcirclefunction takes as an argument aradiusbut this parameter specifies the whole width of the face.) -
eye_color(string, optional) - a string that specifies the color of the eyes that defaults to"white" -
face_color(string, optional) - a string that specifies the color of the face that defaults to"purple"
Your job: Your job is to use the circle and oval functions to draw a face. The face should be a circle, and it should have 2 oval eyes (see screenshot below).
Note: You MUST use your
circleandovalfunctions to complete this one. Why do all that work again? The eyes need to scale with the width of the face. Their radius in the x-direction should be 1/20 thewidthof the face. Their radius in the y-direction should be 1/18 the width of the face. They should be offset by 1/7 the width of the face from the center of the face in both the x and y-directions (remember, the y-axis is flipped!).
Here’s some tests for your face function (the image you should see can be seen below):
# Testing face!
face(100, 400, 35, eye_color="tomato", face_color="gold")
face(200, 400, 55, face_color="gold", eye_color="tomato")
face(300, 400, 75)
face(400, 400, 95)
Finished Product Screenshot

Testing
Note that while the image you see above will be produced with those function calls, your functions must be able to produce their output at any inputted argument. That is, for example, your bullseye function has to actually use the arguments given to it. We will test your functions with other arguments to make sure that those arguments are actually used in the function body. One example test might be to move the bullseyes to a different y-coordinate and see if that is reflected in your final output!
Make sure to double check ALL function names, parameter names, and default values. Typos or not following the instructions will result in lost points. You will only submit your ex2.py file – do not submit (or for that matter edit) the helper file.
Submission Details
Remember, close IDLE before you submit to ensure that you’ve saved your latest work. Once you’ve successfully submitted you should receive feedback from the autograder in 30 or so minutes. If you fail one of the checks, you’re welcome to resubmit (up to the Canvas resubmit limit for that assignment). If you’re confused on how to fix one of the checks, then bring your submission and the test results to office hours!