LEARNING OBJECTIVES:
- More practice working with built-in functions
- Practice writing your own functions
 In this assignment, you are going to write some functions to draw compound shapes of your own design/choosing. At the end of this assignment, someone should be able to use your function to draw your creature: anywhere on the screen at any size or color. In other words, your function needs to honor the parameters that are passed into it. If you don’t quite know what this means (it’s a confusing concept for people just learning to program), make sure to ask questions!
Make sure to download the Starter File AND the Shapes Module file and move them to the same spot in your cs110 folder. Rename the starter file ex3.py so you know exactly which file to submit when you’re done.
| Starter File | Shapes Module File | Shapes Module Documentation (Link) |
|---|
Do I need to import these functions?
Normally, in order to use functions from an external module, we have to specifically import the functions we wish to use:
How do I call these functions?
All functions are always called the same way. There's no way we could go through examples of every single function being called...but we don't have to!
As long as we have access to all of that info in the function's header, like is provided in the Shapes Module Documentation link above, we can call ALL of those functions!
How do we use a shape as input to a function?
Starting with the tutorial this week, all of the shape functions we've given you are reporter functions. So we can store their result in a variable, and then use that variable as input to any of the other functions that accept shapes! There are some examples on the Tutorial 3 page as well as on edSTEM.
What about other shapes?
You can feel free to make other shape functions by utilizing the ones we've given you. If you'd like help figuring out how to make another basic shape, post on edSTEM and I'll either help you brainstorm or add it to the shapes library for everyone. You are not allowed to use shapes from any other source and cannot use any methods of the Canvas class.Part 1. Compound Shape Warmup
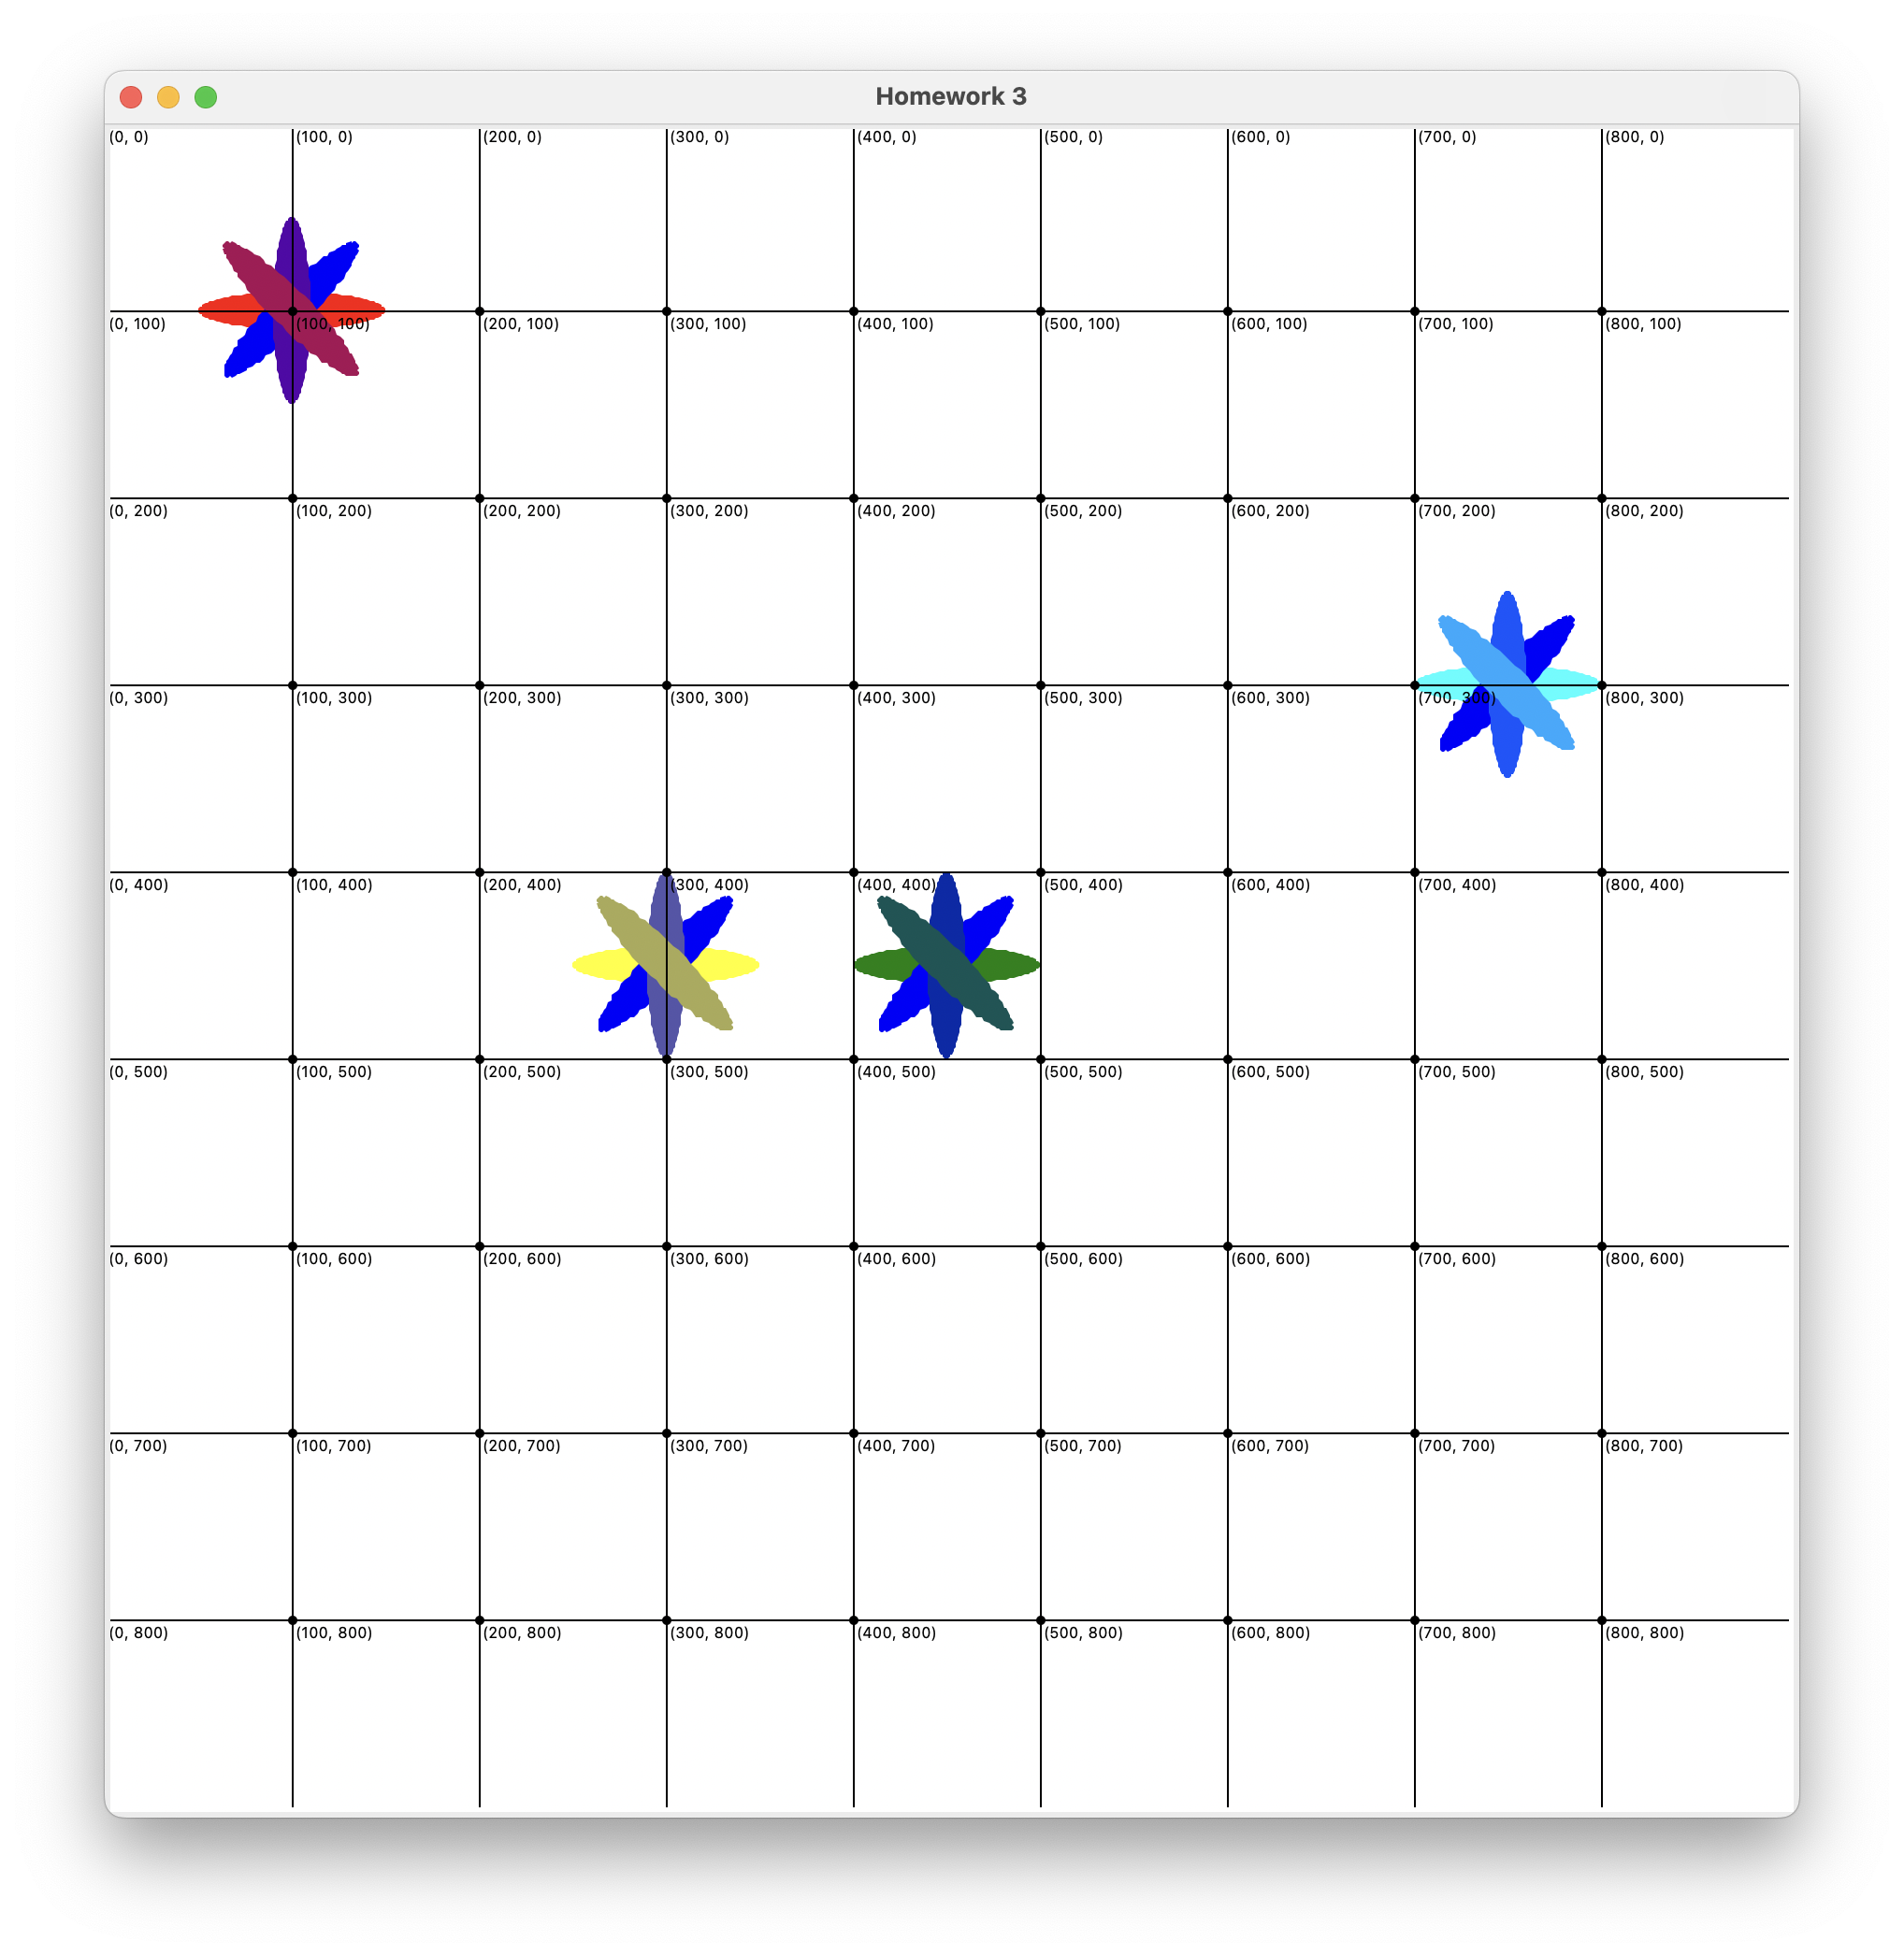
Your first task is to write a function called flower, that draws a 8-petal (4 ovals) flower like the below. Your function must be named flower and have the following parameters:
- A positional (required) parameter,
center, specifying the x-y position of the center of your flower (should be atuple). - A keyword (optional) parameter,
radius_x, specifying the radius in the x-direction of each petal (the default should be 50). - A keyword (optional) parameter,
radius_y, specifying the radius in the y-direction of each petal (the default should be 10). - A keyword (optional) parameter,
color(astr) which specifies the color of the petals. You can choose which color is the default value.
Hints!
- There's an example of creating a compound shape using these functions on Tutorial 3
- First make a single oval and place it at the right coordinate; save it in a variable
- Then make 3 more ovals – now we don't care about where they go; just about their size and color. Save them in variables so we can use them later
- Now rotate each of those 3 ovals using the rotate function (don't rotate the first one, then rotate the second one by 45 degrees, then 90 degrees, then 135 degrees)
- Finally, use the overlay function on each shape to overlay it onto the original oval!
On a Mac in Dark Mode - you might not see the grid!
If you're on a Mac and are currently in Dark mode, you might get white grid lines with greyish dots. You can fix this by either:- Use these instructions from Apple to switch to Light mode.
- On line 2, change the value of the background input to "black" rather than
"white".
For example, I used these calls to make the flowers below (note, I used the interpolate_colors function to make multi-colored petals; yours can just be a single color).
flower((450, 450), color="green")
flower((100, 100), color="red")
flower((300, 450), color="yellow")
flower((750, 300), color="cyan")
Finished Product Screenshot
Make sure to test your function by writing some function calls. Remember, your function needs to use all of its parameters. (Hint: You’ll need to use overlay and rotate)
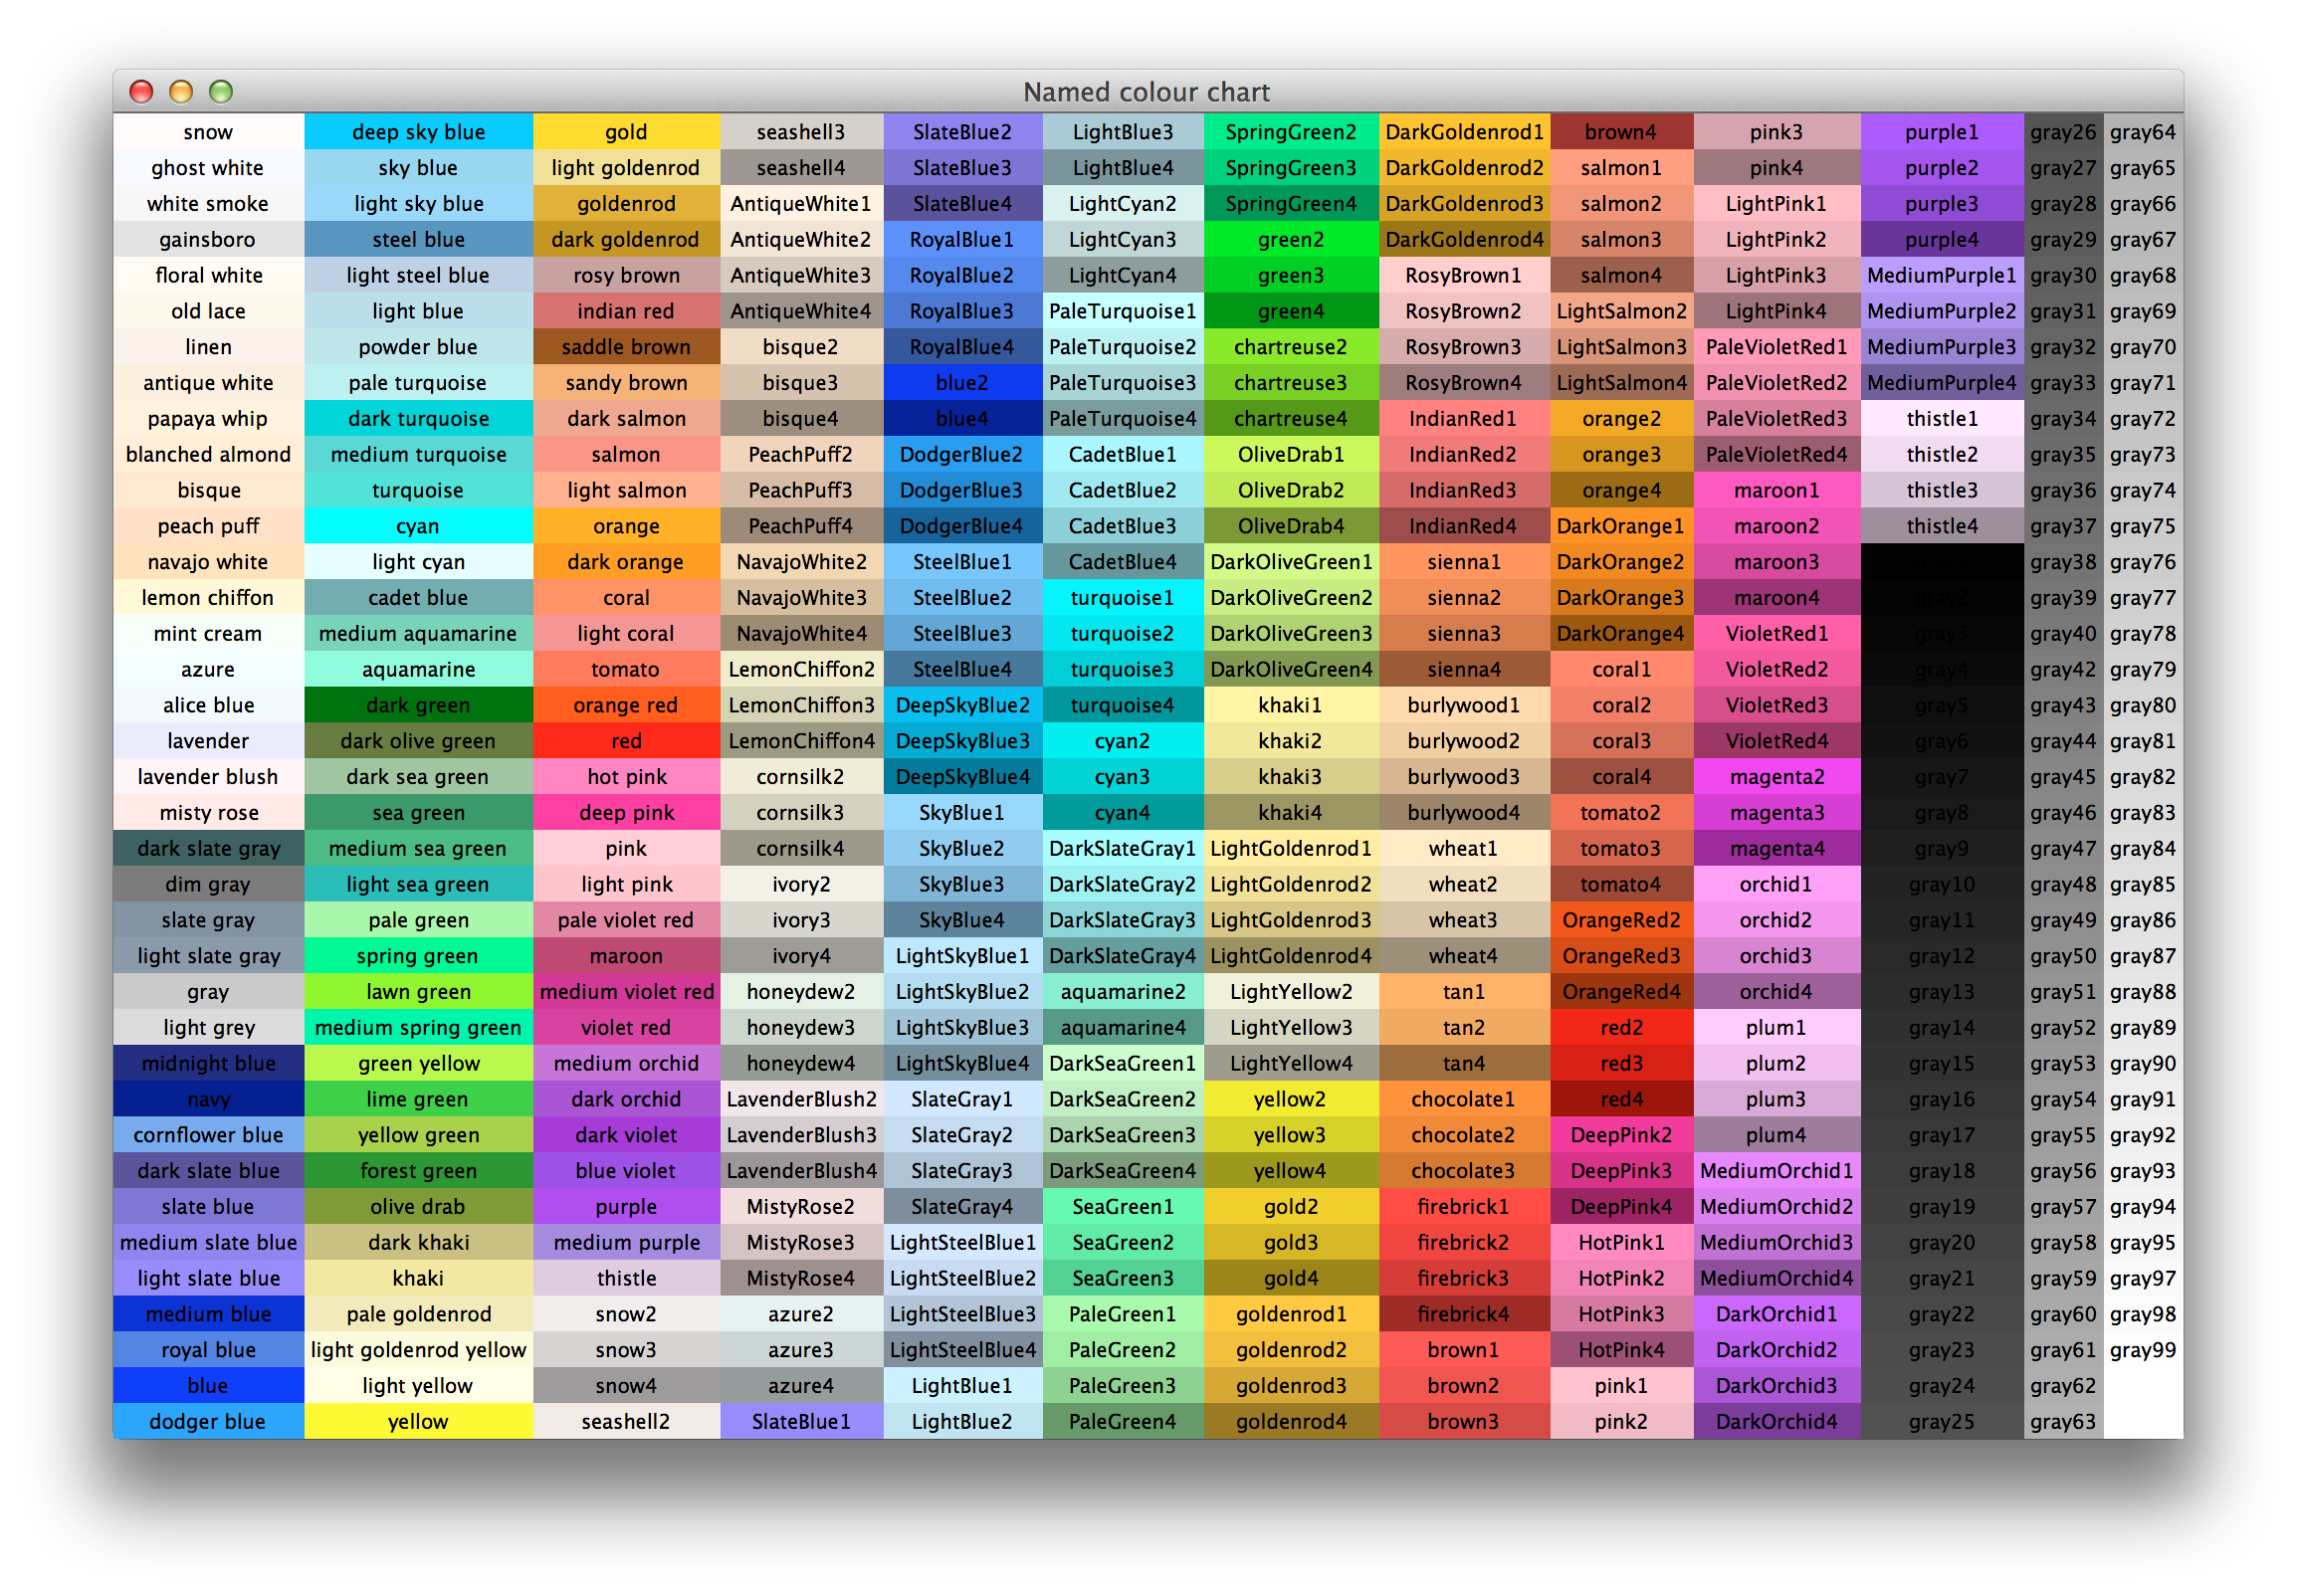
Want some cooler colors to work with?
Part 2. Design your creature
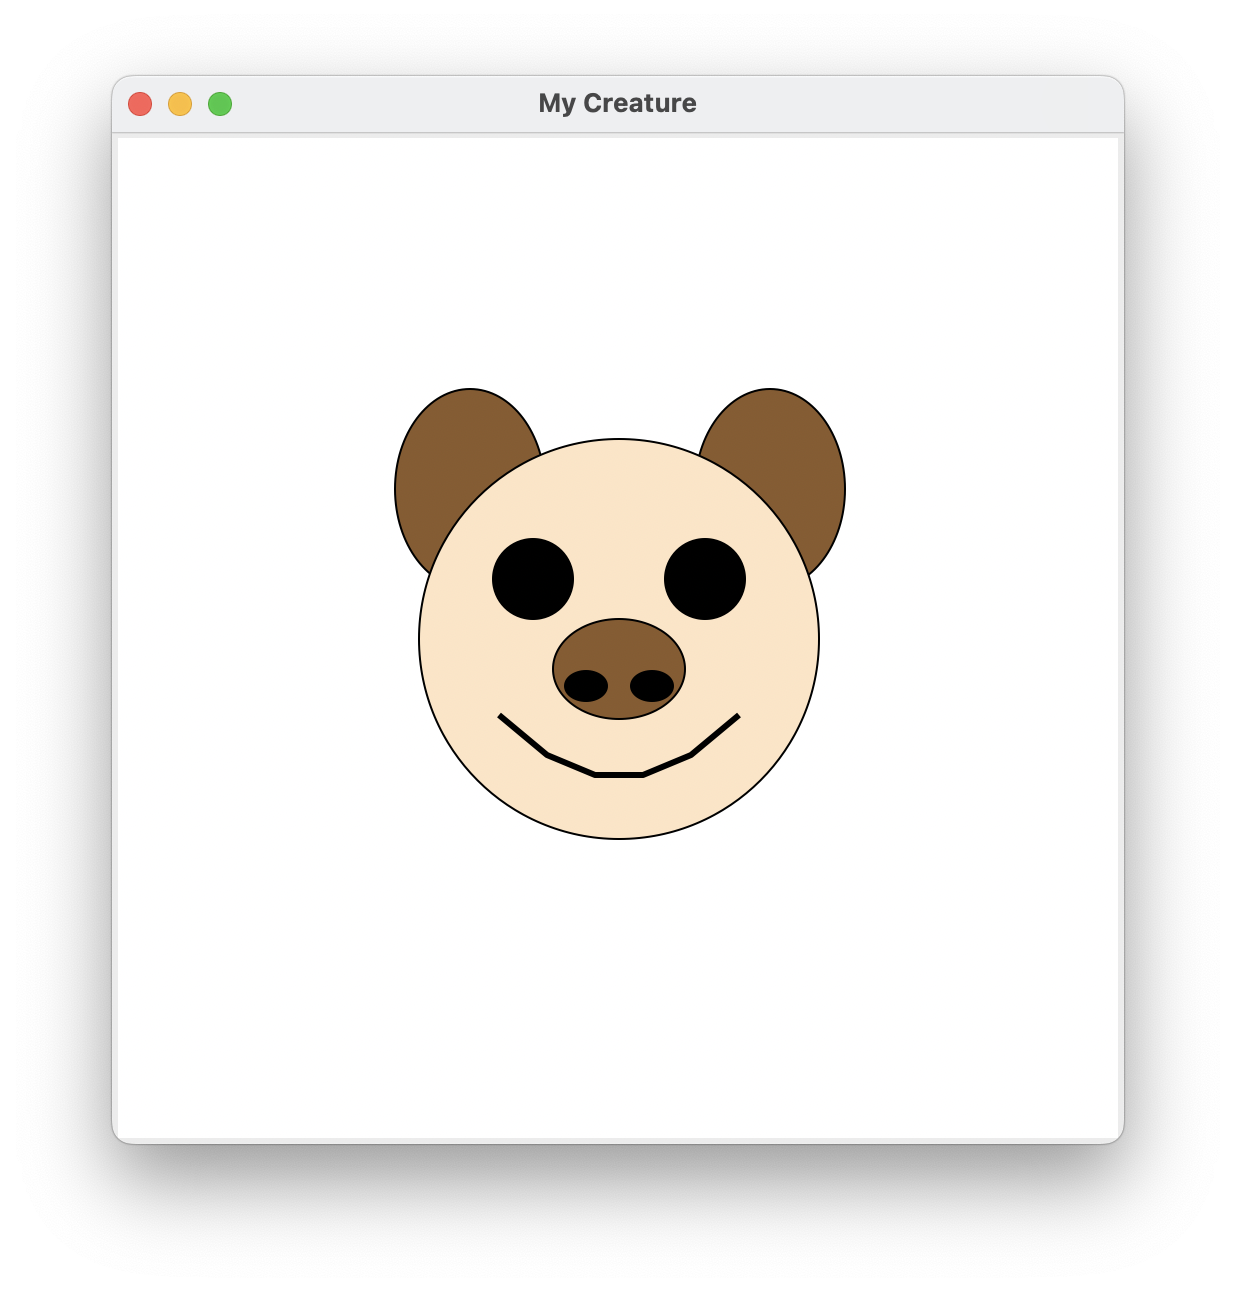
On paper, sketch out some creature ideas (aim for using between 5-8 shapes). These can be different variations of the same creature or all different ones. You can just implement the head of your creature (similar to the bear at the top) or the whole thing — the choice is up to you. Here are some links to ideas:
- Some Sample Creatures on YouTube
- Some Sample Creatures on Pinterest
- Simple monster designs
- A google search!
After you’ve done some sketching on paper, select the one that you would like to use for the assignment and draw the creature bigger on a different piece of paper — ideally graph paper — and label the points that will help you to program your creature. Remember, to think in terms of shapes that we already know how to make using our basic shapes: ovals, circles, bullseyes, squares/rectangles, and polygons! Just like we have with ovals, circles, squares, etc, you’ll be responsible for writing a function that creates your creature from a series of parameters (center coordinate, width, etc.).
AGAIN: Making a simple creature (e.g using 5-8 shapes) is totally fine. You don’t need to get too detailed unless you want to! And you can always enhance your creature at a later point in time.
Part 3. Implement your creature using function calls
Once you are satisfied with your animal concept, draw those shapes inside your ex3.py file. You can use any combination of shapes (points, lines, polygons, rectangles, ovals, etc.) from Tutorial 3. This first “sketch” of your creature need only create a single creature (i.e. if you run it over and over again it’ll make the same creature over and over again). Once you’ve gotten this simple version working, then we can work on “parameterizing” it (in the next part you’ll turn this creature into a creature function).
Tips!
- You are free to use either method of compounding: math (HW2) or layout functions (Tutorial 3 Part 2)
- Keep it simple (we recommend anywhere between 5 (minimum) to 8 shapes)! You can always add more functionality later.
- Make only one or two changes at a time and then test out those changes by running your file. This makes things easier to debug.
- Use the grid that gets drawn to help you figure out the "math" behind your design!
Part 4. Turn it into a creature function
Note: this process is not easy. See edSTEM for a walkthrough of an example.
Once your program successfully draws the creature that you sketched, we’re going to turn it into a function. We’ll start by adding positional and keyword parameters. First write a function header (the name needs to be creature) with the following parameters:
- A positional (required) parameter,
center, specifying the x-y position of the center of your creature (should be atuple). - A keyword (optional) parameter,
color_a(astr) specifying the primary color of the creature. In the case of the bear, this is the face color. Remember, optional parameters require default values. You can choose which color to be the default value. - A keyword (optional) parameter,
color_b(astr) specifying the secondary color of the creature. In the case of the bear pictured above, this was the ear color. You can choose which color you’d like to be the default value. - A keyword (optional) parameter,
size, specifying the size of the creature (should be anintorfloat). You can choose the default value. - If you want to add other parameters (for instance, the size of the ears for the bear) you are free to do so to further customize your creature, but make sure they are optional parameters!
Then move all of your creature code into the body of that function.
Part 5. Parameterizing
Now comes the hard part, change your program so that it is parameterized–that is, instead of drawing a SINGLE version of your creature, it uses the parameters of the function to draw any different creature specified by those parameters (e.g. different location, different size, different colors, etc.)
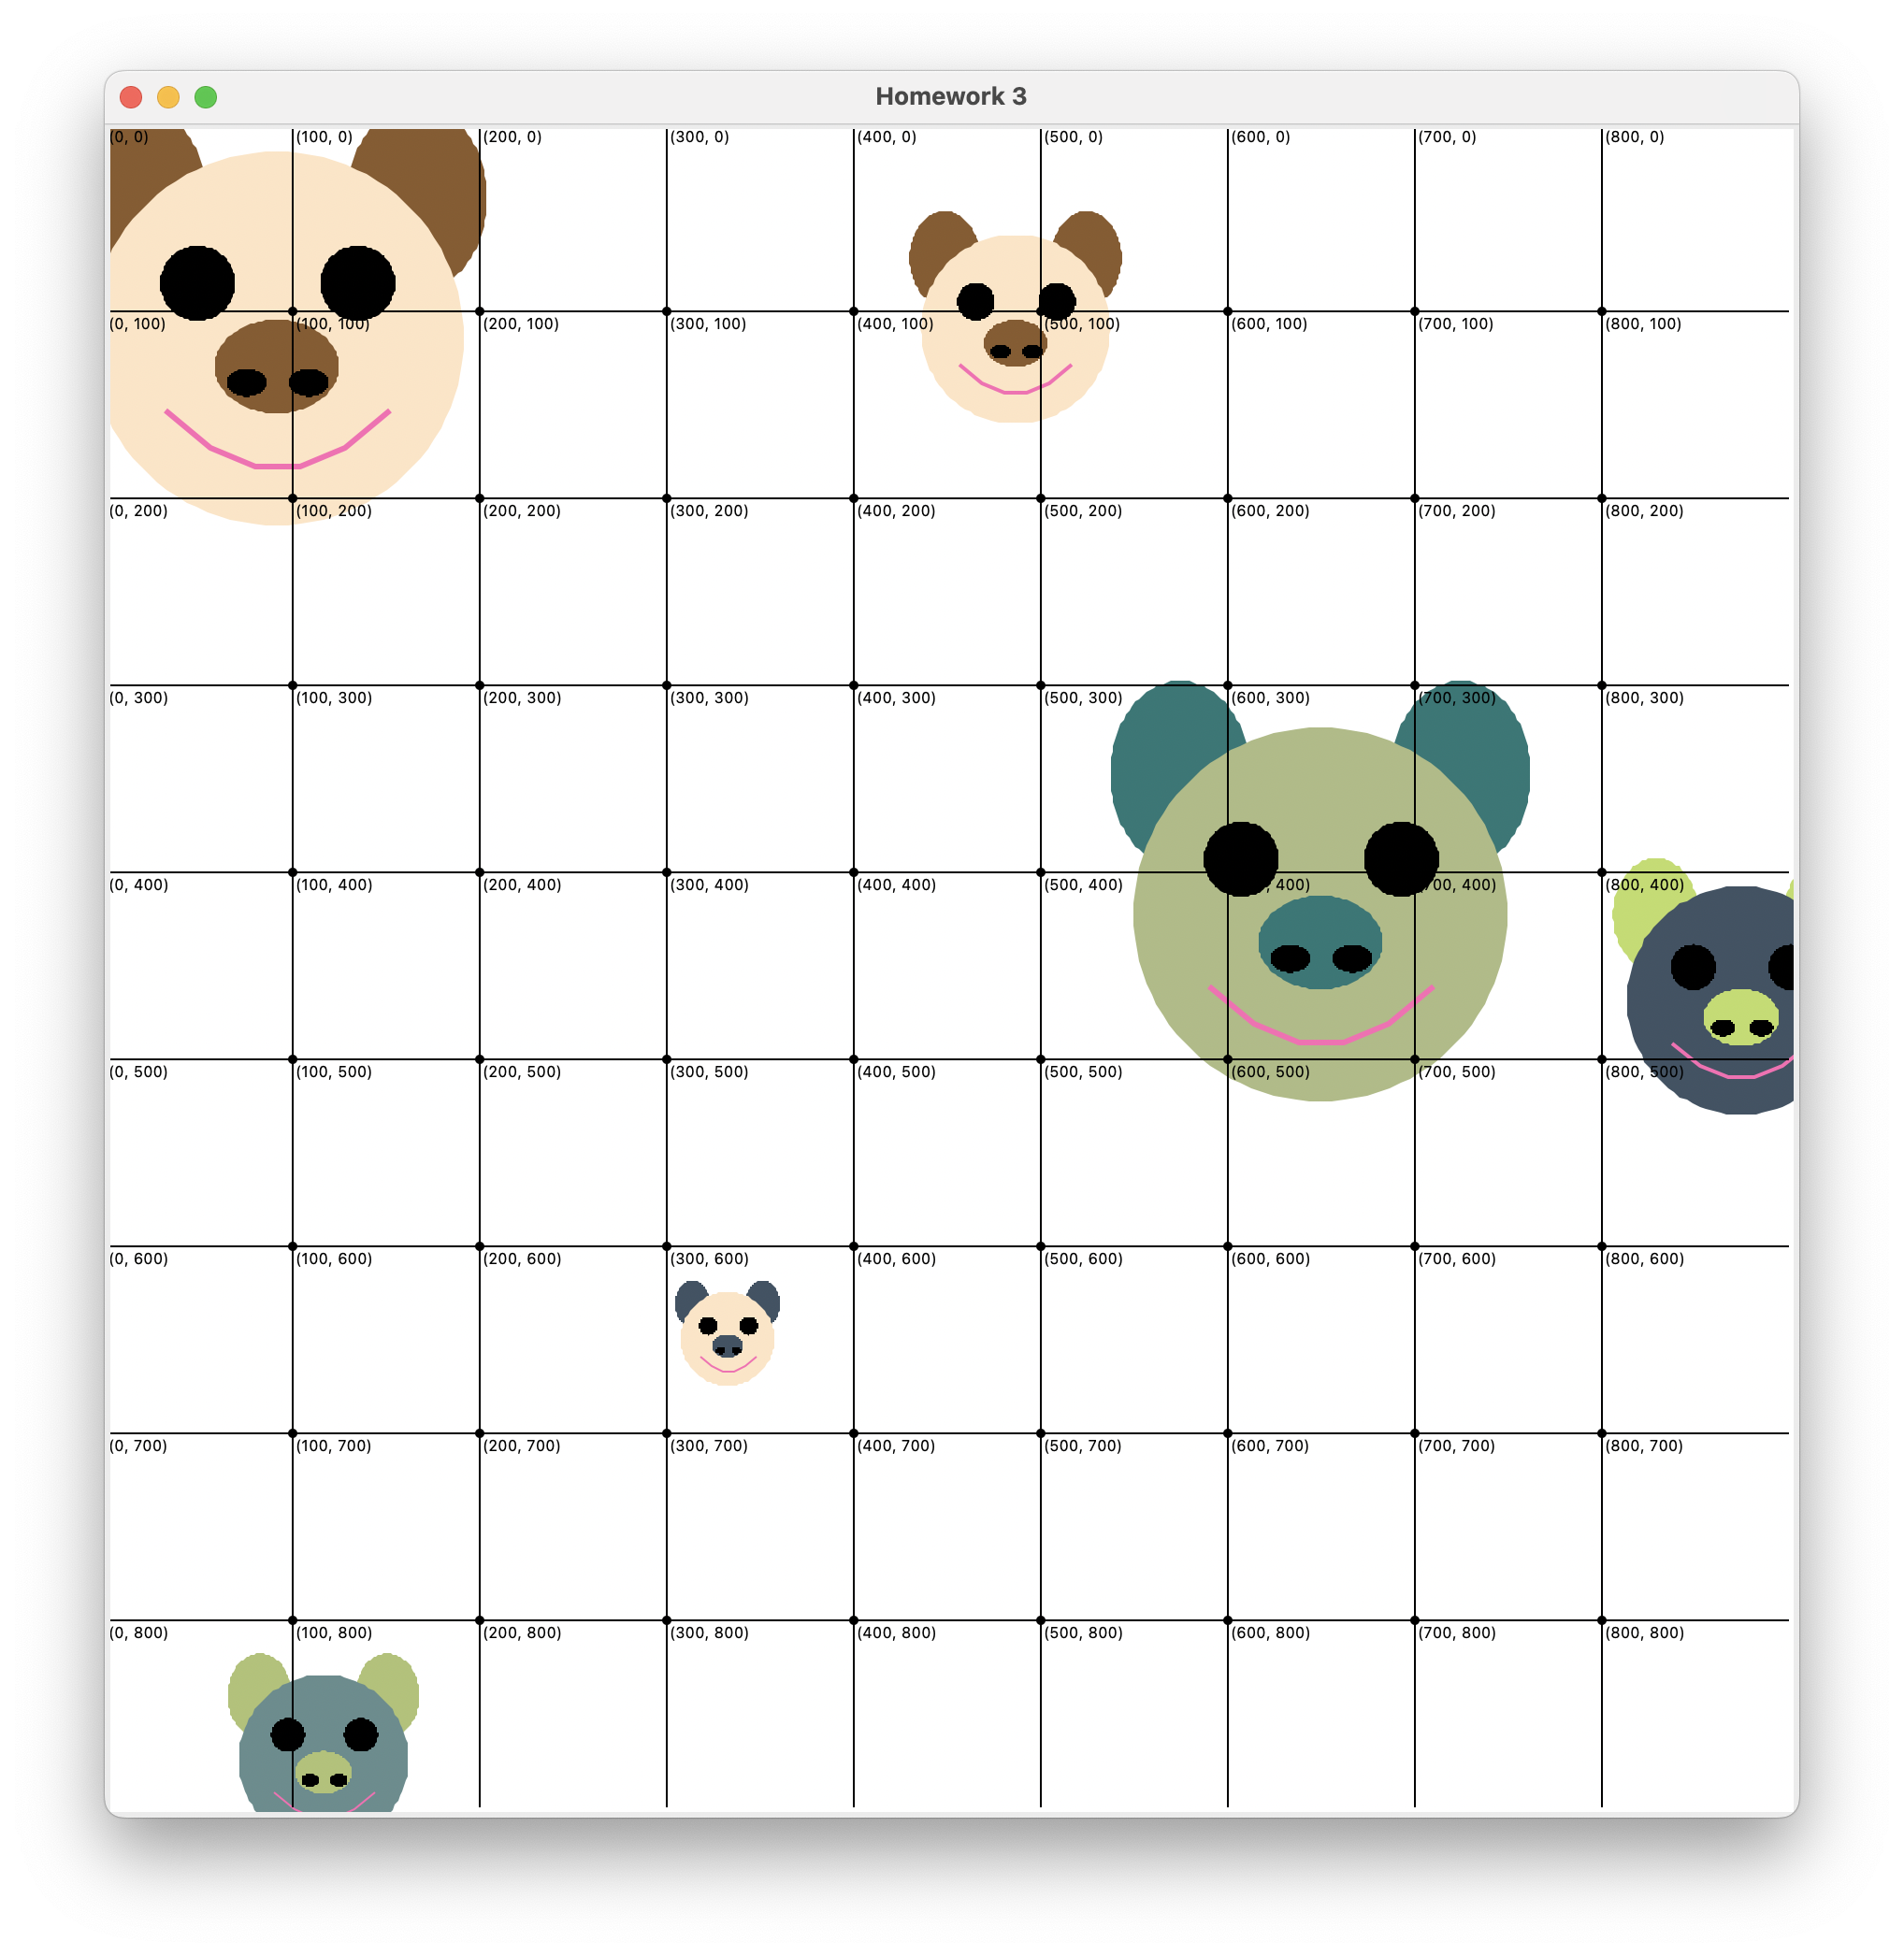
When you’re done, please try at least three calls to the creature function, using different arguments to verify your function creates your creature at different locations, sizes, and colors. For instance, after completing the assignment, I used my creature function in the following way to produce the drawing below (feel free to use whatever arguments you want for your positional / keyword parameters):
# with a function, you can make slightly different versions of your design,
# thereby reusing the same code over and over again
creature((93, 115))
creature((488, 111), size=99)
creature((651, 424), color_a="#3f5364", color_b="#648d8e")
creature((334, 651), color_b="#aebb83", size=51)
creature((116, 874), size=92, color_a="#227876", color_b="#3f5364")
creature((474, 468), size=123, color_a="#afc272", color_b="#bfdc65")
Having a problem with your creature sizes?
Depending on how you implement the size input in your function body, your creature might appear WAY too big or WAY too small. While we won't be expecting an exact relationship between the size of your creature and the actual visual size it ends with, it should be roughly like our creature below. If you find your creature to be way too big with the test calls, an easy way to fix this is to, at the very beginning of your function, do the following:size = size / 10 this just says "make the size 1/10 the size someone entered". Depending on your design, you might need to tweak that denominator to scale the image well. If your creature is too small on the other hand, you might do:
size = size * 10 The cool thing about this fix is that all it's doing is changing the value stored in the `size` variable. We only need to change it in that one place because everywhere we use `size`, python will use the smaller value cause that's what's stored in there!
Finished Product Screenshot
Part 6. Smoke Testing your Function
Using the above example tests is a great way to make sure that your function works as described. But often times in programming, we want to do more thorough testing than just a bunch of specific magic numbers. The concept of smoke testing is meant to test functions by giving them a bunch of basic arguments, and making sure our functions don’t crash and provide reasonable input. You last job is to write three new function calls to your creature function that instead of using “hard coded” parameters, uses calls to the random module that’s built into Python (1. for random location; 2. for random size; 3. for random colors). You may not import the entire random module. You must only import the two functions: choice and randint. You must call randint 3 times: x-cor, y-cor, size; and choice twice: for color_a and color_b.
Step by Step
- Import the random module's functions named randint and choice into your file (hint: do this at the top of your file)
- Write one function call to creature that uses two function calls to randint to place the creature at a random (x,y) coordinate on the canvas.
- Write one function call to creature that uses a function call to randint to generate a random size of your creature.
- Write one function call to creature that uses two function calls to choice to pick random a color_a and color_b. (Hint: you can make a palette by just making a list of some of the colors you've loved or pick some new ones!)
Note that you can either do this in steps like we did in class or do it as part of each function call by composing those function calls:
How to use the randint function
randint is a reporter function that is most useful for generating integers. It is part of the random module so make sure to import it via from random import randint. It has the following parameters: - lower_bound (int) - the min number to generate
- upper_bound (int) - the max number to generate
How to use the choice function
choice is a reporter function that is most useful for picking a random element from a sequence! It is part of the random module so make sure to import it via from random import choice. It has the following parameters: - a_sequence (list, tuple, or str) - the sequence to pick a random element of
Make sure your program runs with the five new function calls and that you get different results each time you run your program.
What to Submit
If your function is working correctly, draws at least 5 shapes as part of your creature, and all of the input parameters will be honored (i.e. the creature will be drawn at the correct position at (roughly) the specified size, and with the specified colors). Make sure to submit ONLY your ex3.py file to Canvas by the deadline.
Submission Details
Remember, close IDLE before you submit to ensure that you’ve saved your latest work. Once you’ve successfully submitted you should receive feedback from the autograder in 30 or so minutes. If you fail one of the checks, you’re welcome to resubmit (up to the Canvas resubmit limit for that assignment). If you’re confused on how to fix one of the checks, then bring your submission and the test results to office hours!