Submitting
Regardless of how you choose to complete the assignment, you MUST submit the file you worked on to Canvas.
If you’re submitting in-class, make sure to check-in (there will be one question called CHECK-IN Q only available for the first 7 minutes of class) and check-out (there will be a three question survey called CHECKOUT SURVEY only available for the last 10 minutes of class) using PollEverywhere with your location verified.
If you’re submitting out-of-class, make sure to submit your .PY file to be graded. Take extra care to double check you've followed the instructions!
Intro
LEARNING OBJECTIVES: In order to prepare you for this week’s homework exercise, we wanted to use this tutorial session to go over a couple of important logistical and conceptual ideas.
- Making sure that the new graphics library is successfully running on your computer
- Creating functions
- Working with parameters & arguments
- Translating specifications into smaller steps that a computer can perform
Note on using Other Functions
Note, you are NOT allowed to use any other functions or methods that are not specifically mentioned below. This is one of the learning objectives of the assignment.You need to download and place BOTH of these files in the same folder. You will only need to open / edit the one that’s named tutorial2_template.py.
| Tutorial Template File | Helper File |
|---|
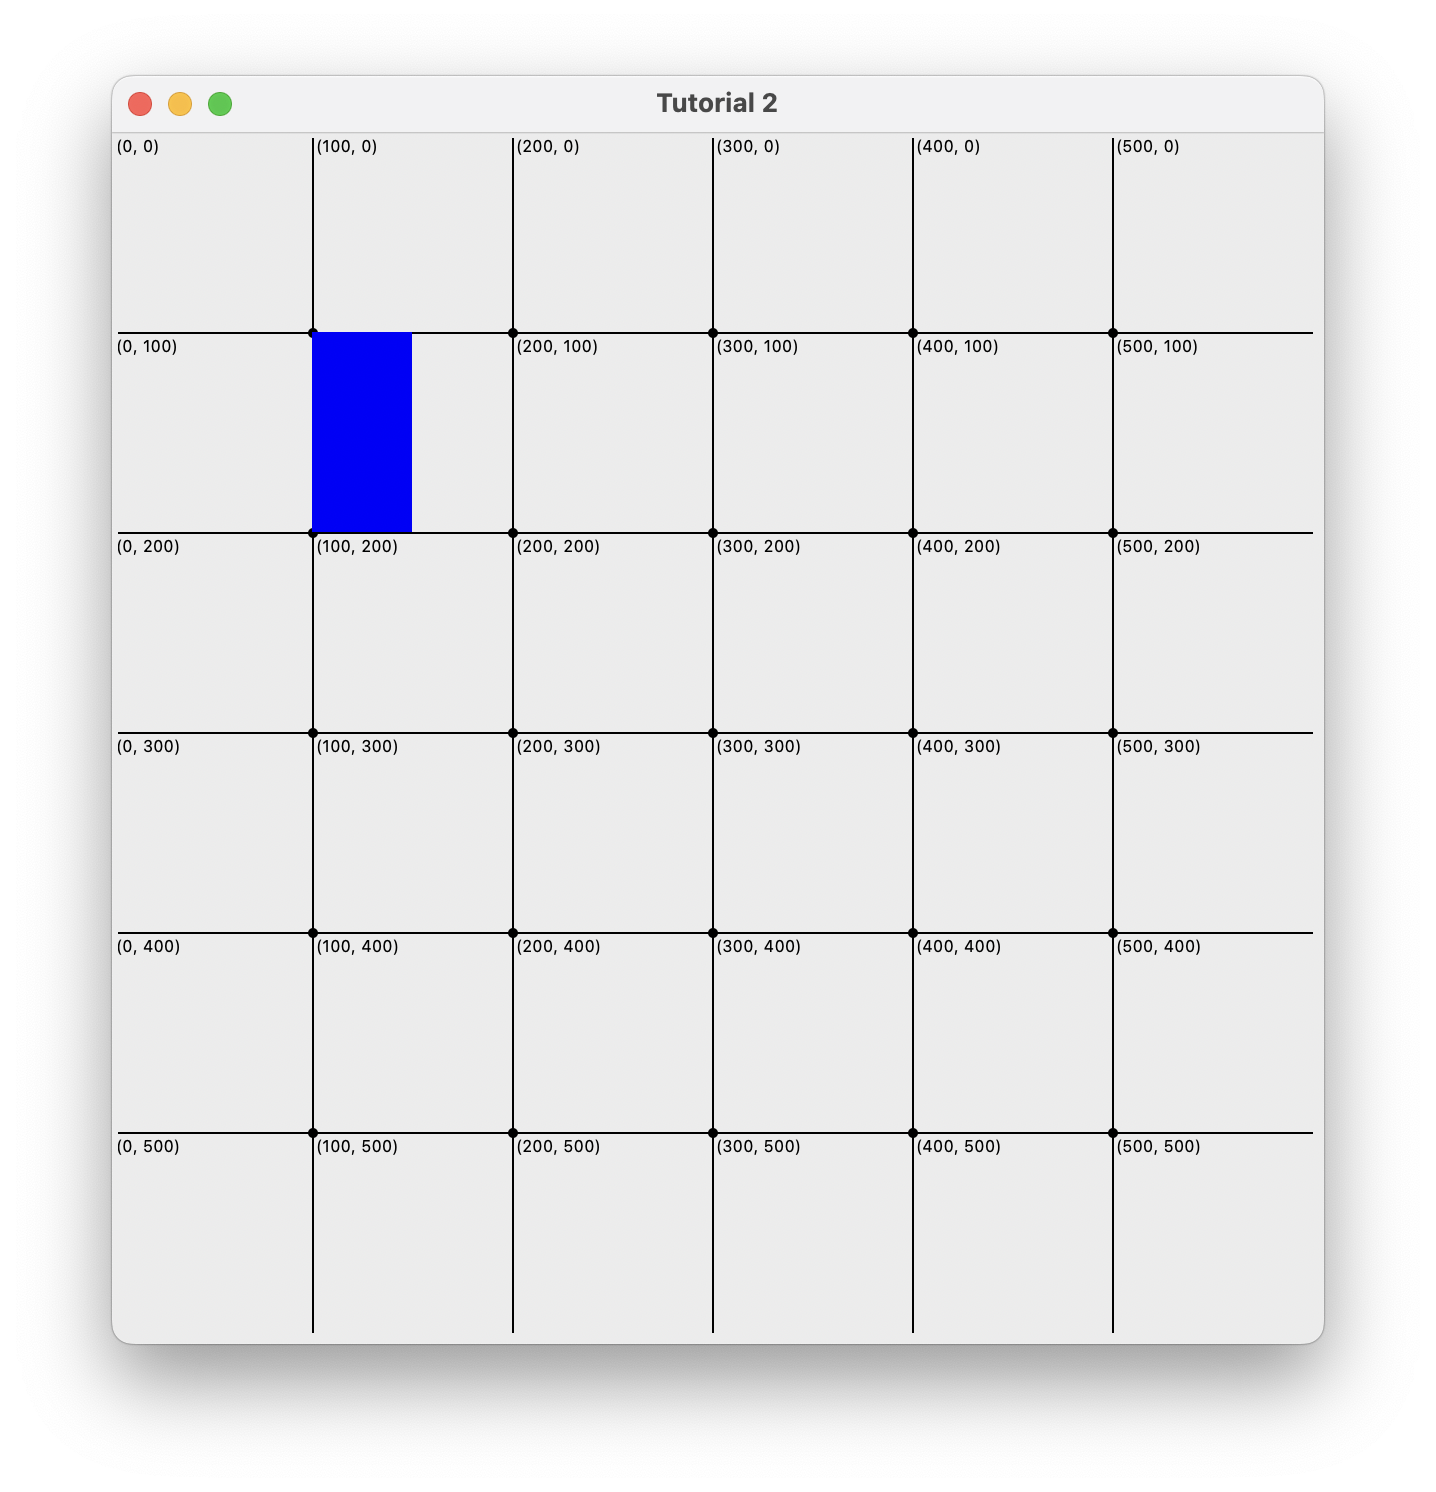
Go ahead open the file in IDLE, take a look at it, and then run it. You should see something like this:
Screenshot
Does your pop-up look different?
If you're on a Mac and are currently in Dark mode, you might see a white grid line with greyish dots..If you would like to change this either:
- Use these instructions from Apple to switch to Light mode.
- On line 2, change the value of the
background argument to"black" rather than"white" .
Scroll down in your file until you see the following:
rectangle(
    100,
    100,
    50,
    100,
    color="blue")
Note: If you’d like to show line numbers in IDLE, go to the
Optionsmenu and click onShow Line Numbers.
Here’s the official documentation of the rectangle function:
rectangleis a function used to draw rectangles in a popup window (sometimes called a “canvas”):
int: a top-left corner x-coordinateint: a top-left corner y-coordinateint: how wide should the rectangle beint: how tall should the rectangle be and one optional argument:- color (
str): the name of a color to fill in the shape with
Using the above documentation, think about what that function call does. Talk with a partner and see if you can figure it out.
Solution (don't click until you think about it!)
It asks Python to create a rectangle shape with the following 4 required parameters:- a top left corner x-coordinate of 100 (an
int ) - a top left corner y-coordinate of 100 (an
int ) - a width of 50 (an
int ) - a height of 100 (an
int ) - specify the optional parameter called
color to thestring "blue"
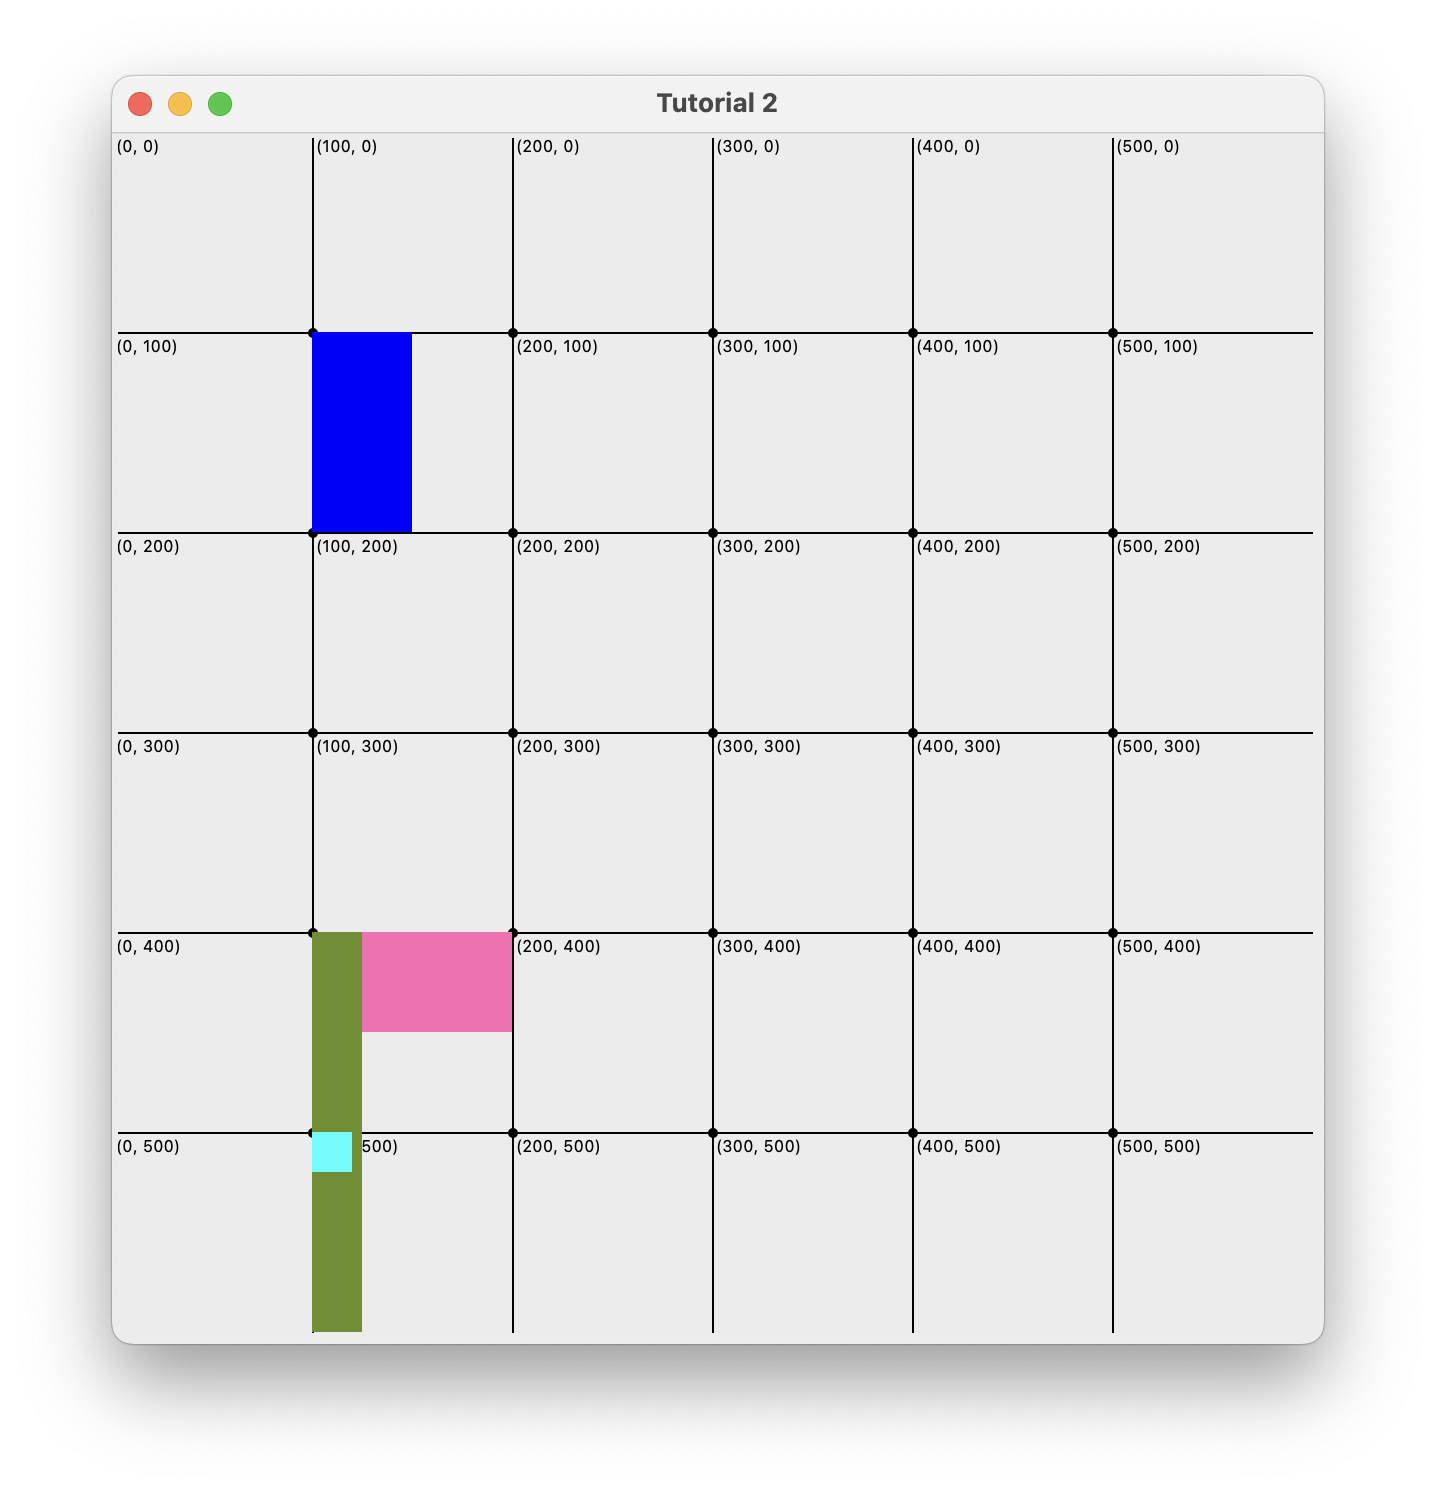
Next practice using the rectangle function by making the following shapes:
- rectangle with its top-left coordinate at
(100, 400)with width100and height50that’s the default color (i.e. don’t specify a color). - rectangle at
(100, 400)with width25and height100 + 100that’s"olive drab" - a square (which is just a special rectangle) at
(100, 500)with width/height20that’s"cyan"
Screenshot
Activity 1. square
Last time, we talked about how we could write a function to replace the idea of “copy and pasting” code over and over again for repeated actions. However, we can also use functions to think about the concept of flexibility. For instance, right now, the rectangle can produce any rectangle. But squares are also rectangles (you even drew one above).
A square is just a special rectangle. It’s a rectangle with equal width and height.
Your job is to write a function that draws squares, which we’ll call square. It will have the following parameters:
note, in the real world you get to decide on your own names for these parameters, but for simplicity, we’re giving you the names you should use here:
-
top_left_x: an x-coordinate for the top-left corner of the square -
top_left_y: an y-coordinate for the top-left corner of the square -
width: the width (and also height) of the square. -
color(str, optional): a name of color of the square, which defaults to:"hot pink".
In other words, if we invoked your square function as follows…
square(200, 100, 100, color='blue')
…your function would draw a 100x100 blue square with its top-left corner at position (200, 100), as pictured above.
To do this, you’re going to create a function that accepts arguments like the above uses them with the rectangle function to draw a square. Here’s a few of the challenge’s you’ll need to address.
- First you’ll need to write the function header. Here’s a little hint of what that’ll look like (note, if your browser window is narrow it will look like this is on two lines, but theoretically we put them all on the same line):
def func_name(req_name_1, req_name_2, req_name_3, opt_name=default_value):
    ...
- Then you’ll need to start on the function body:
- The
rectanglefunction draws rectangles not squares. What is the only difference between rectangles and squares? - The
rectanglefunction takes as its first four parameters, an x,y coordinate pair and then a width and a height. Yoursquarefunction only accepts a single coordinate pair as a parameter - the top-left, and then only a single side length / width. What value should you use in yourrectanglefunction forheight. Can you use a specific number? or can we use one of the parameters in this space? - Once you’ve got that working, all that’s left is to make sure your
colorargument gets passed as the correct optional parameter torectangle. Make sure to pay careful attention to variable names here. (Hint: this one is going to look weird…) - Then, just take that command and use it as the function body of your new function definition (remember, it will need to be indented 4 spaces)
- The
def func_name(req_name_1, req_name_2, req_name_3, opt_name=default_value):
    rectangle(function_arguments_go_here)
Test Your New Function
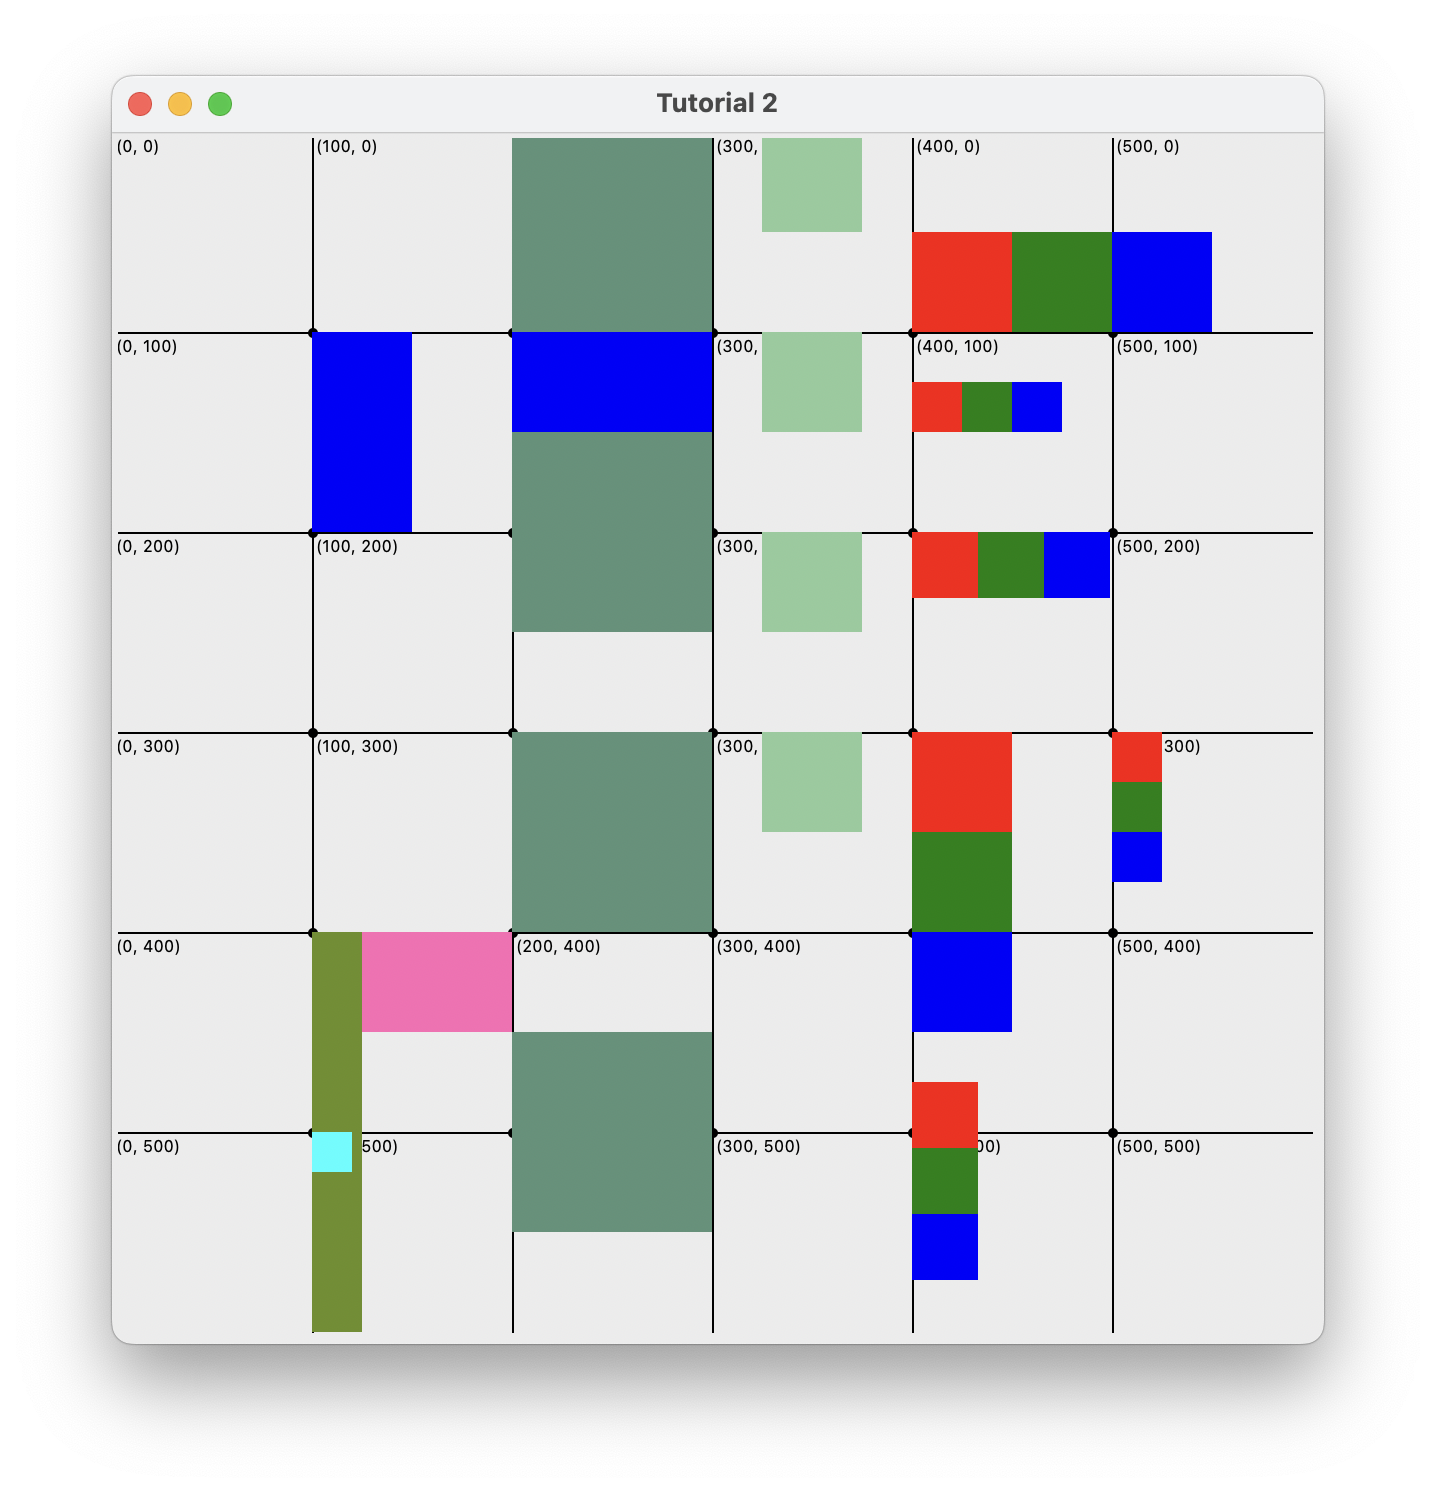
When you’ve finished with your square function, create the pattern pictured below by calling your function with the following arguments (below). Copy the following code and pasting it below your function definition. Make sure these function calls are NOT indented as they are not part of your function definition.
# blue block
square(200, 100, 100, color='blue')

# dark green blocks
square(200, 0, 100, color="#5B9279")
square(200, 150, 100, color="#5B9279")
square(200, 300, 100, color="#5B9279")
square(200, 450, 100, color="#5B9279")

# light green blocks
square(325, 0, 50, color="#8FCB9B")
square(325, 100, 50, color="#8FCB9B")
square(325, 200, 50, color="#8FCB9B")
square(325, 300, 50, color="#8FCB9B")
Screenshot
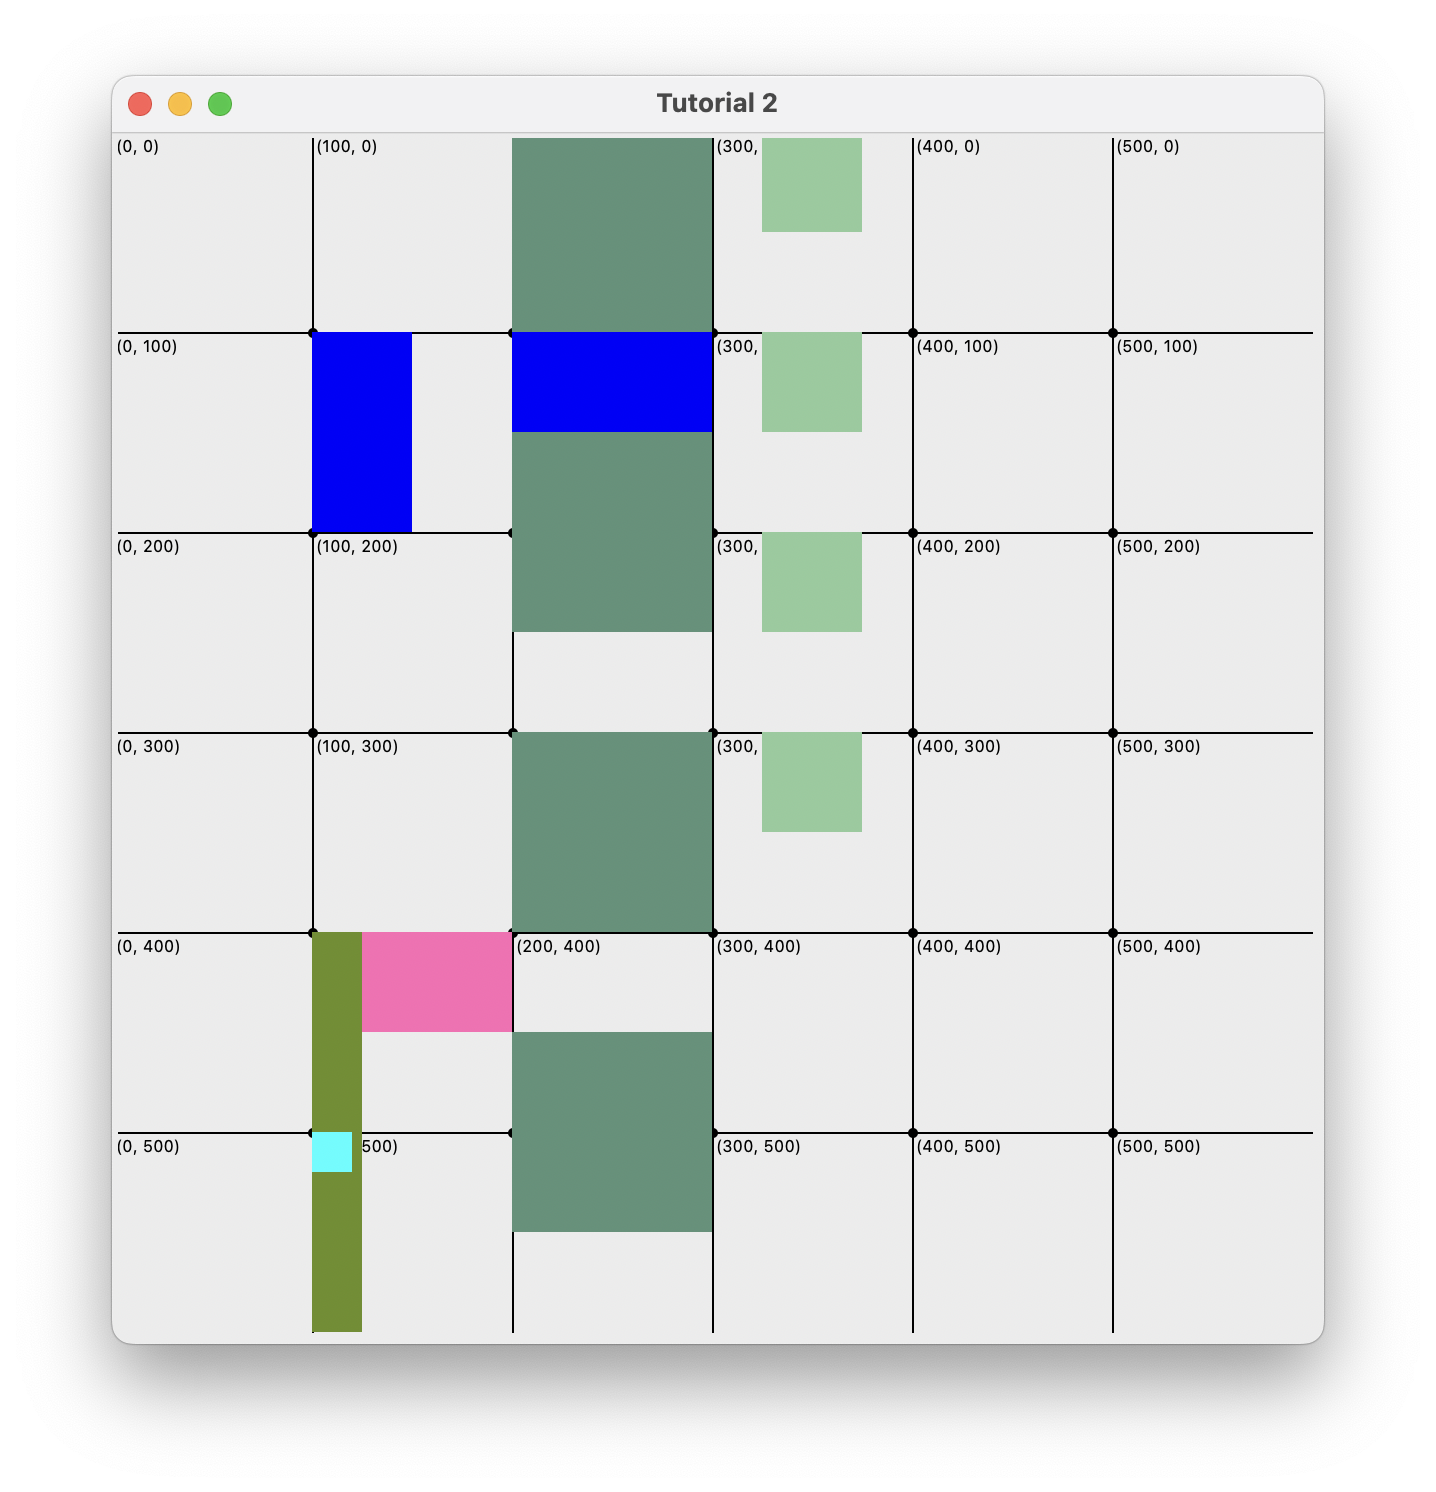
Note, those weird colors (e.g. "#8FCB9B") are called “hex codes” and are colors represented in a symbol system called “hexadecimal” (think of it like the Dewey Decimal system but for colors). Here is a link to a color generator (to browse different hexadecimal color codes, press the spacebar). You can also use regular color names like "green", "blue", "red", etc. (make sure they’re strings though!).
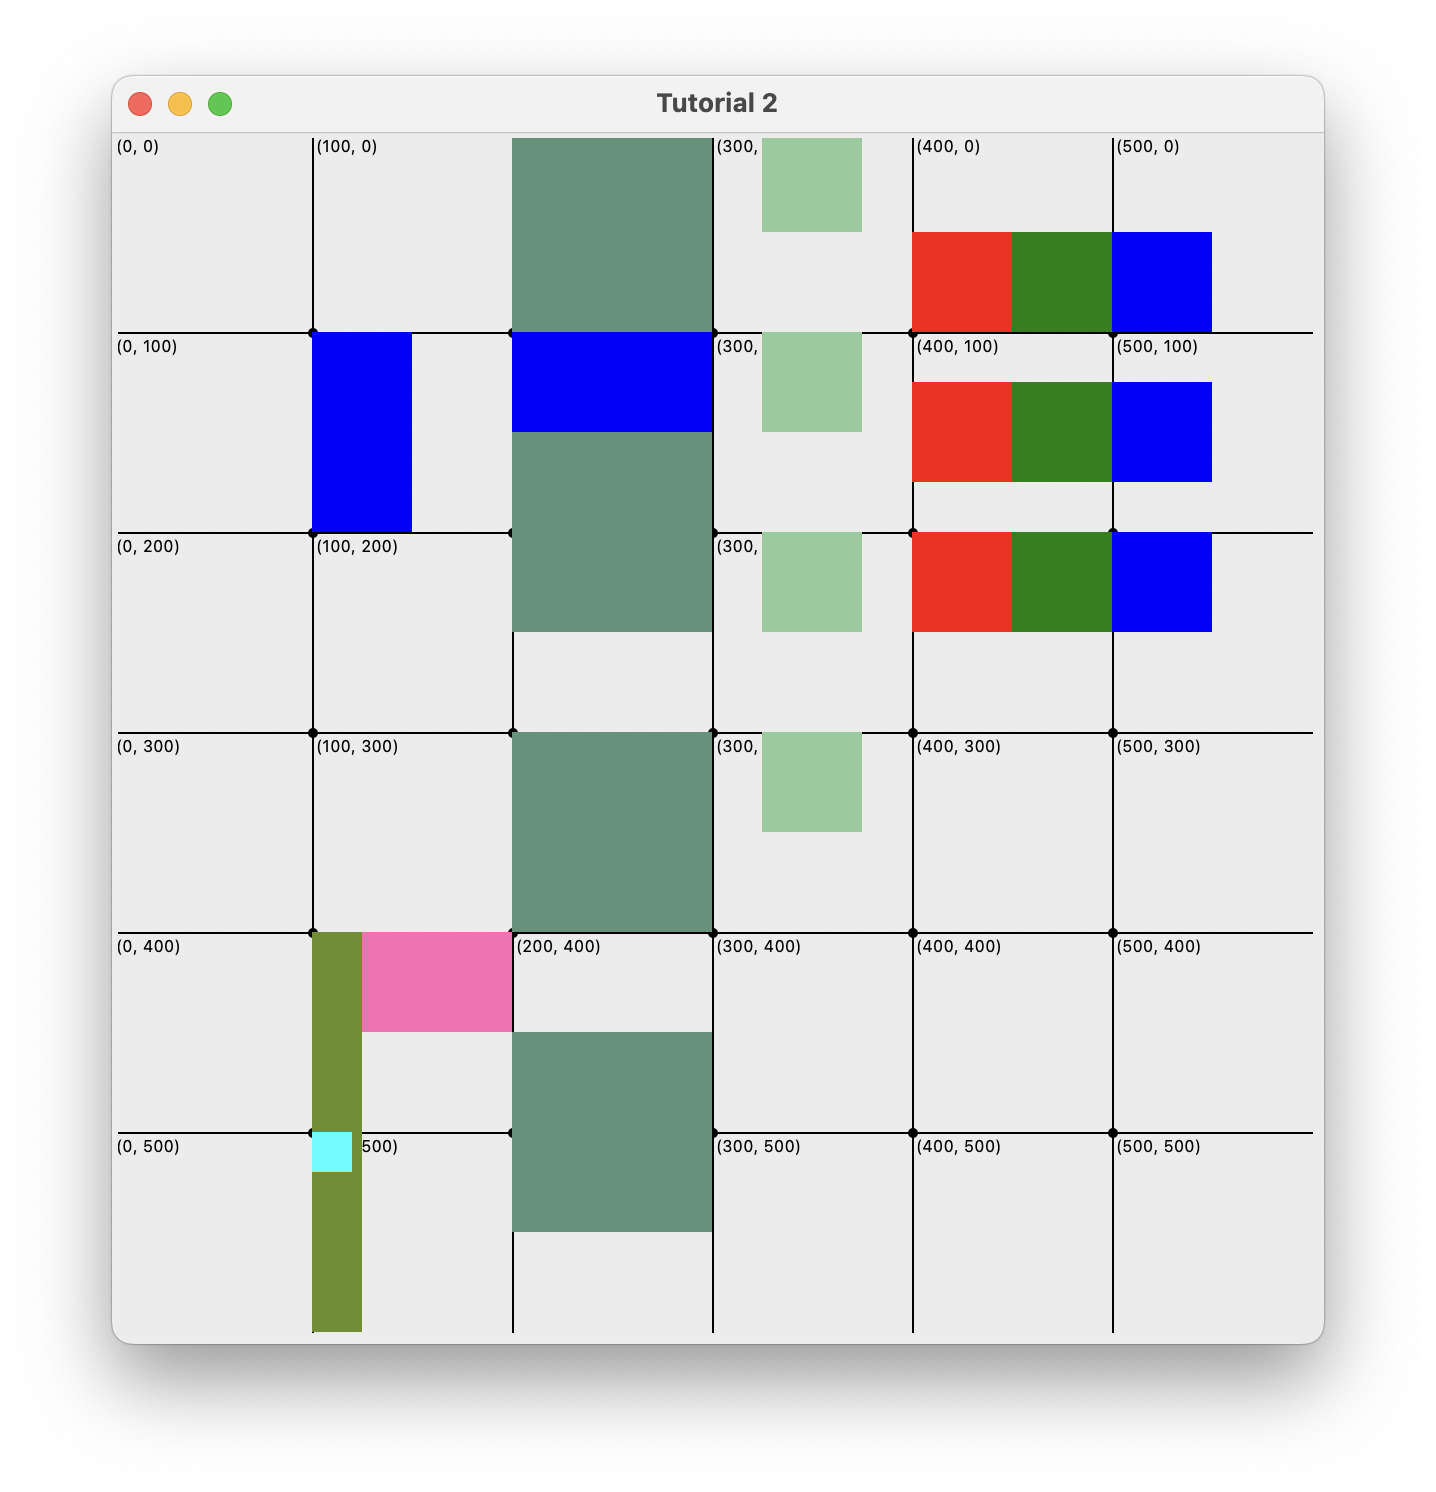
Activity 2. row_of_squares
Now use your square function to write a new function called row_of_squares that draws three squares right next to each other.
It needs to have the following parameters:
- an x-coordinate for the top-left corner of the left-most square
- an y-coordinate for the top-left corner of the left-most square
- the width (and also height) of one of the squares.
The left-most square should be "red", the second should be green, and the third should be blue. Now write some function calls to test your new function.
Screenshot
Activity 3. stack_of_squares
Now use your square function to write a new function called stack_of_squares that draws three squares on top of each other.
It needs to have the following parameters:
- an x-coordinate for the top-left corner of the top-most square
- an y-coordinate for the top-left corner of the top-most square
- the width (and also height) of one of the squares.
The top-most square should be "red", the second should be green, and the third should be blue. Now write some function calls to test your new function.
Screenshot
Activity 4. picture_frame (challenge)
Alright, let’s take it up a notch.
Your job is to write a function which we’ll call picture_frame. It will have the following parameters:
- an x-coordinate for the top-left corner of the square
- a y-coordinate for the top-left corner of the square
- the width (and also height) of the outer square (the “frame”)
- the width (and also height) of the inner square (the “picture”)
- frame_color (str, optional): a name of color of the square, which defaults to
"blue" - pic_color (str, optional): a name of color of the square, which defaults to
"yellow"
Note: That’s a lot of parameters. If you’d like, you can add new lines (returns) after each comma, to make the function header a little more easy to read by spreading it out onto several lines instead of one long one.
Use the above definition to write the function header.
For the function body, you should use your square function. You’re going to draw two squares,
- The first will be the “frame” square and it will be a square that’s the frame and have a top-left coordinate as specified by the function parameters.
- The second will be the “picture” square. It will be a square that’s the pic with the specified width. You have to calculate it's top-coordinate based off of the top-coordinate of the frame!.
Hint!
The top-left coordinate of the "pic square" will be the same as the "frame square" but shifted DOWN and to the right by something related to the pic width!Hint 2!
If you draw it out...you might see some relationship between the two top-left coordinates... They're offset by half of the difference between the frame and pic widths!Note: the order in which you draw them matters because if you draw the smaller one first and then the bigger one…the bigger one will cover up (or occlude) the smaller one!
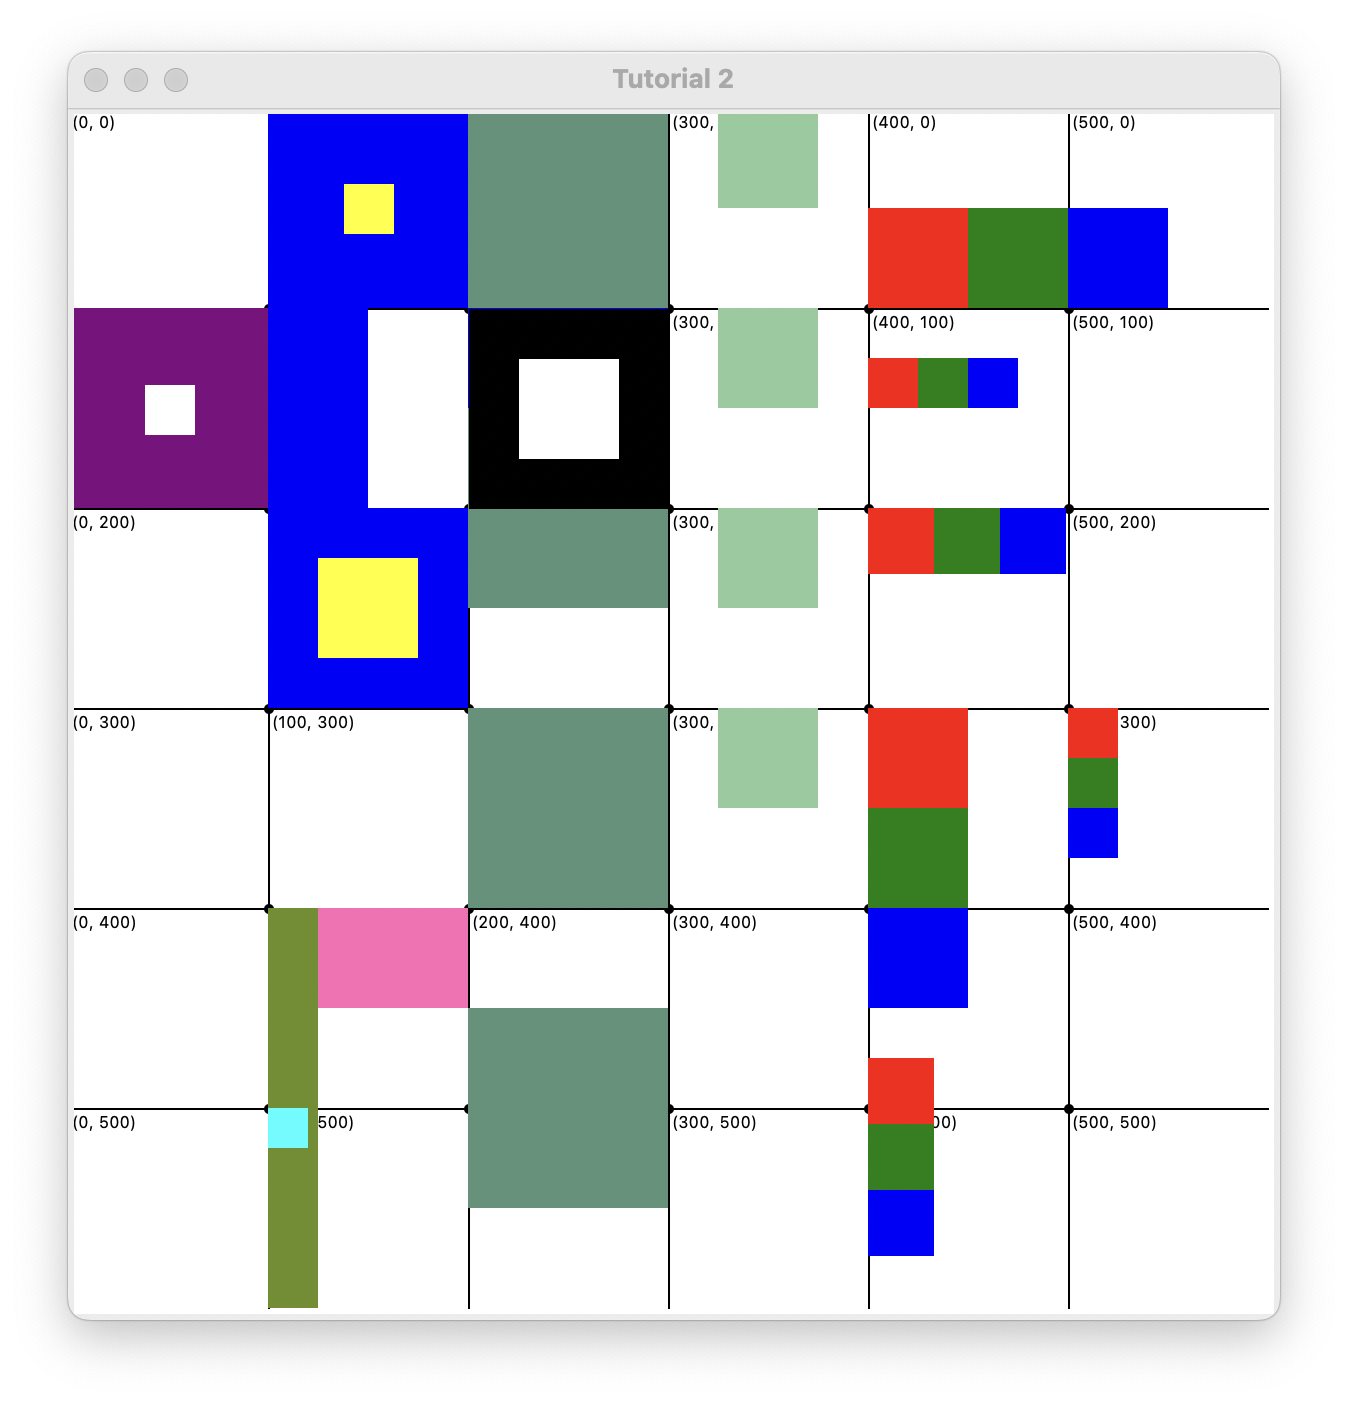
If you need more specific examples, checkout the below test cases you should try and their resulting output:
picture_frame(100, 0, 100, 25)
picture_frame(200, 100, 100, 50, frame_color="black", pic_color="white")
picture_frame(100, 200, 100, 50)
picture_frame(0, 100, 100, 25, frame_color="purple", pic_color="white")
Screenshot
Some Pro Tips
- Always save your python file before running it so that the interpreter “sees” your changes.
- In order for your interpreter to recognize your file as a Python file, you must give it the
.pyfile extension (e.g.my_program.py). - Don’t forget to name all of your variables “snake case” (all lower case, underscores to separate words).
- If your code doesn’t run, practice reading and trying to understand what the interpreter is telling you. If you see red error text, the computer is trying to tell you where the problem is.